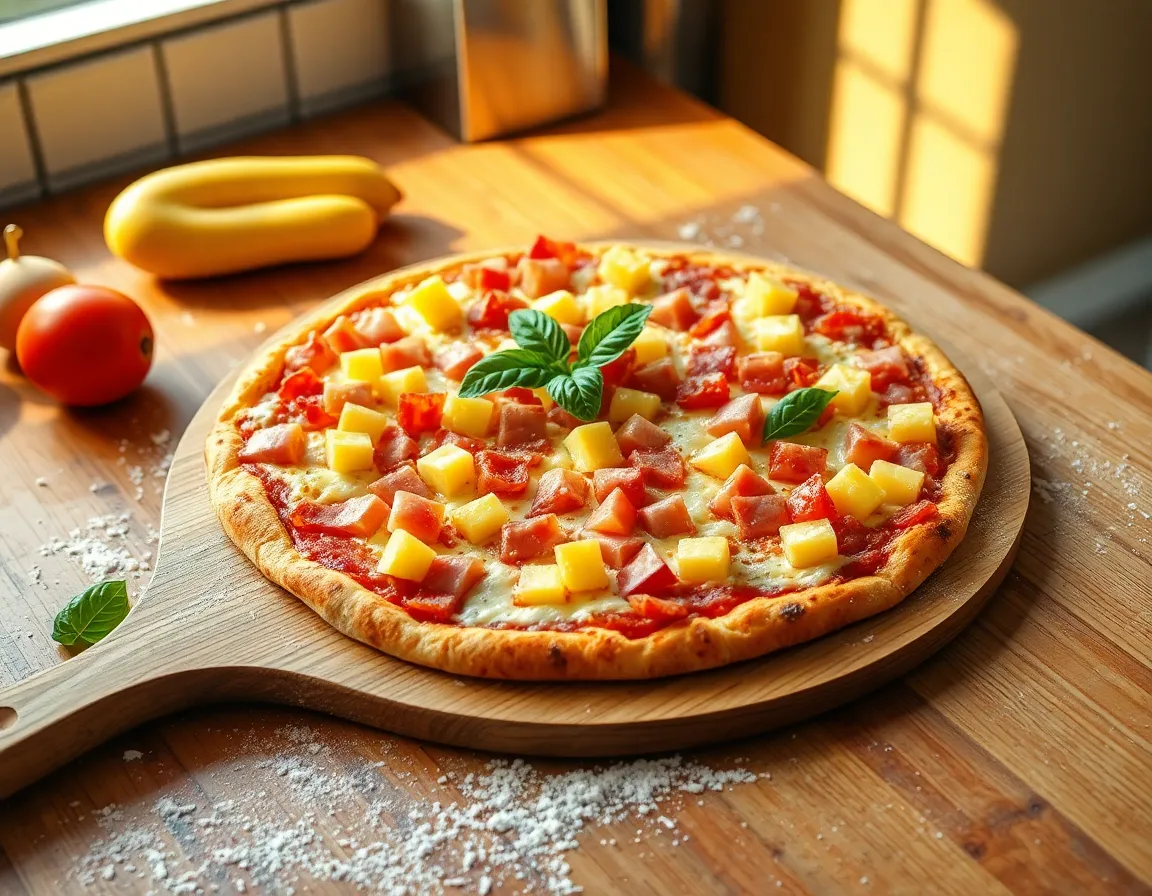
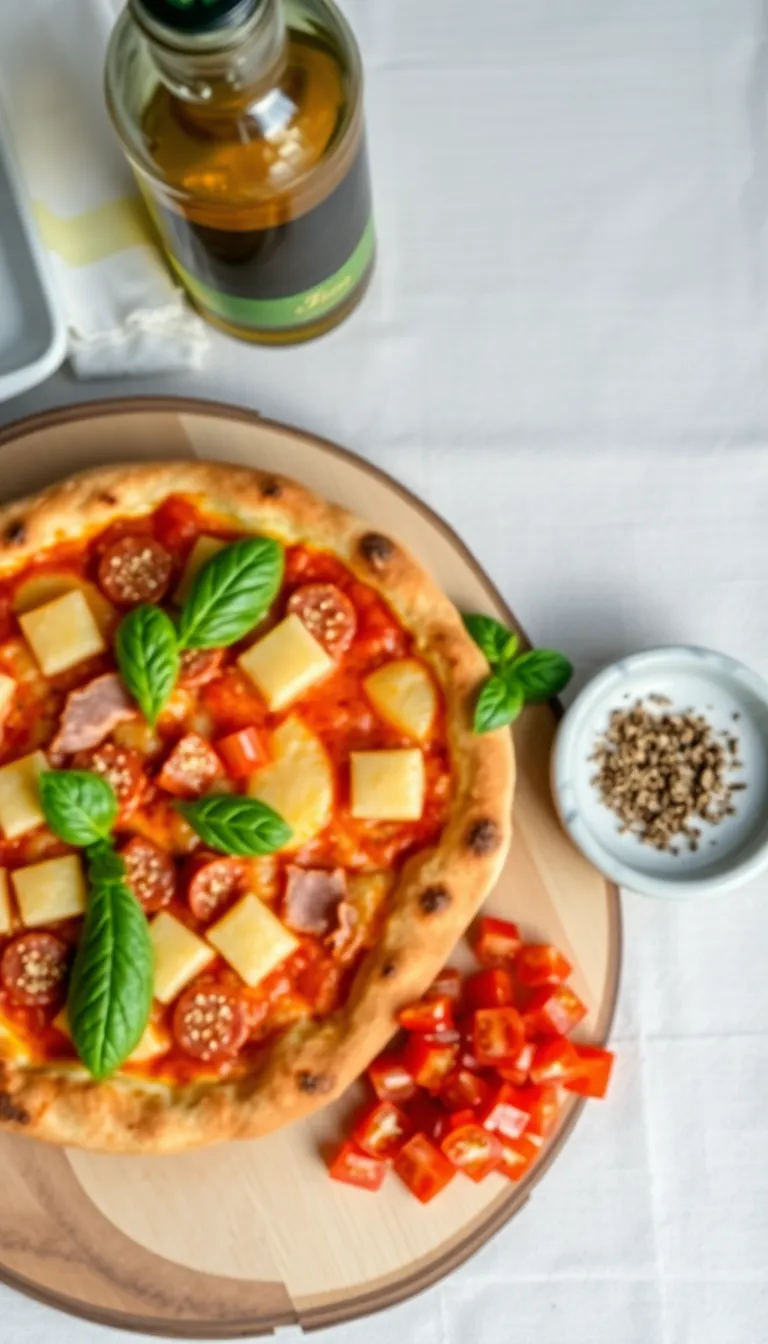
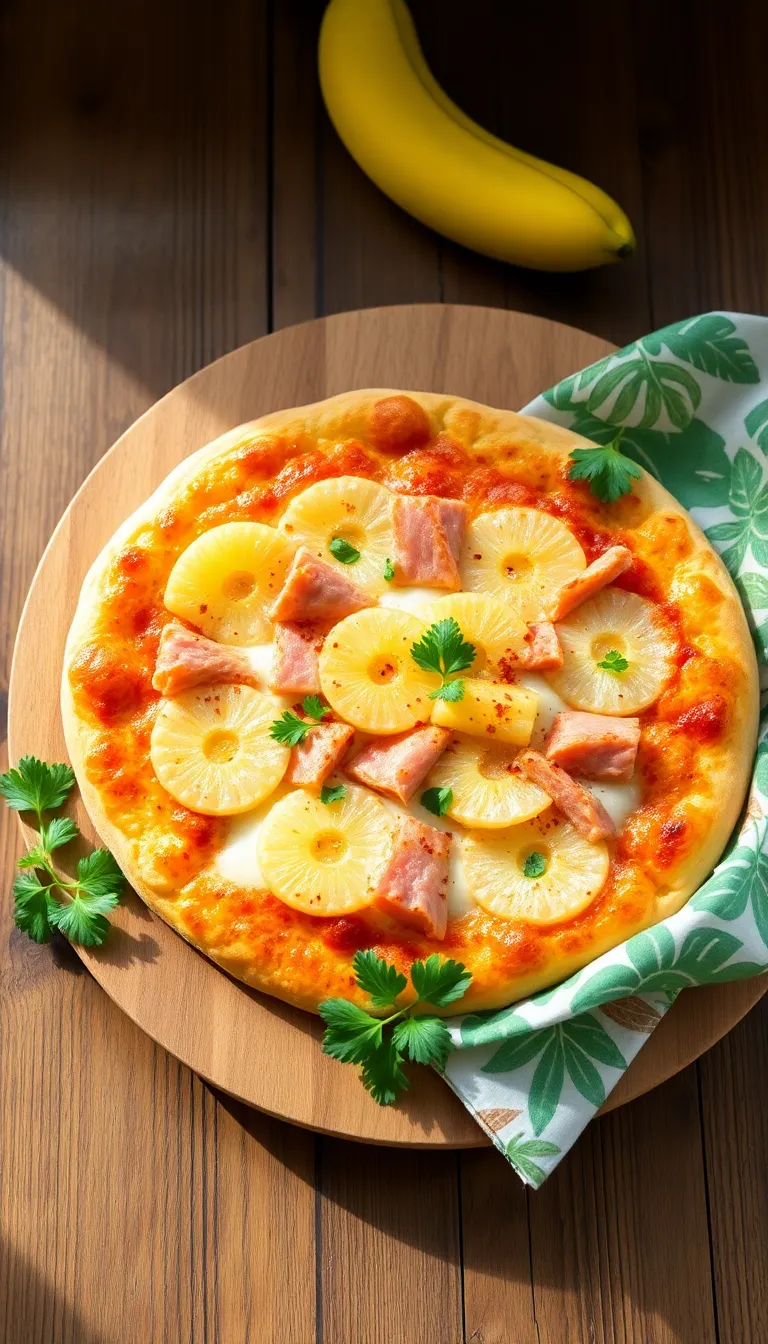
Imagine biting into a slice of paradise where the sweetness of pineapple dances with savory ham atop a bed of gooey cheese and a perfectly crisp crust. This Hawaiian Pizza Recipe brings a delightful twist to your dinner table, inviting both beginners and seasoned cooks to embark on a flavor-packed adventure. It’s an irresistible combination that promises a tropical escape in every bite, making it a unique and delicious choice for any pizza night.
Whether you’re a novice in the kitchen or a pizza-making pro, this recipe is designed to guide you effortlessly to perfection. The vibrant contrast of tangy tomato sauce and the gentle heat of melted cheese creates a symphony of flavors that will leave your taste buds singing. With clear instructions and easily accessible ingredients, you’ll feel confident in crafting this culinary masterpiece that is sure to impress and satisfy.
About This hawaiian pizza Recipe
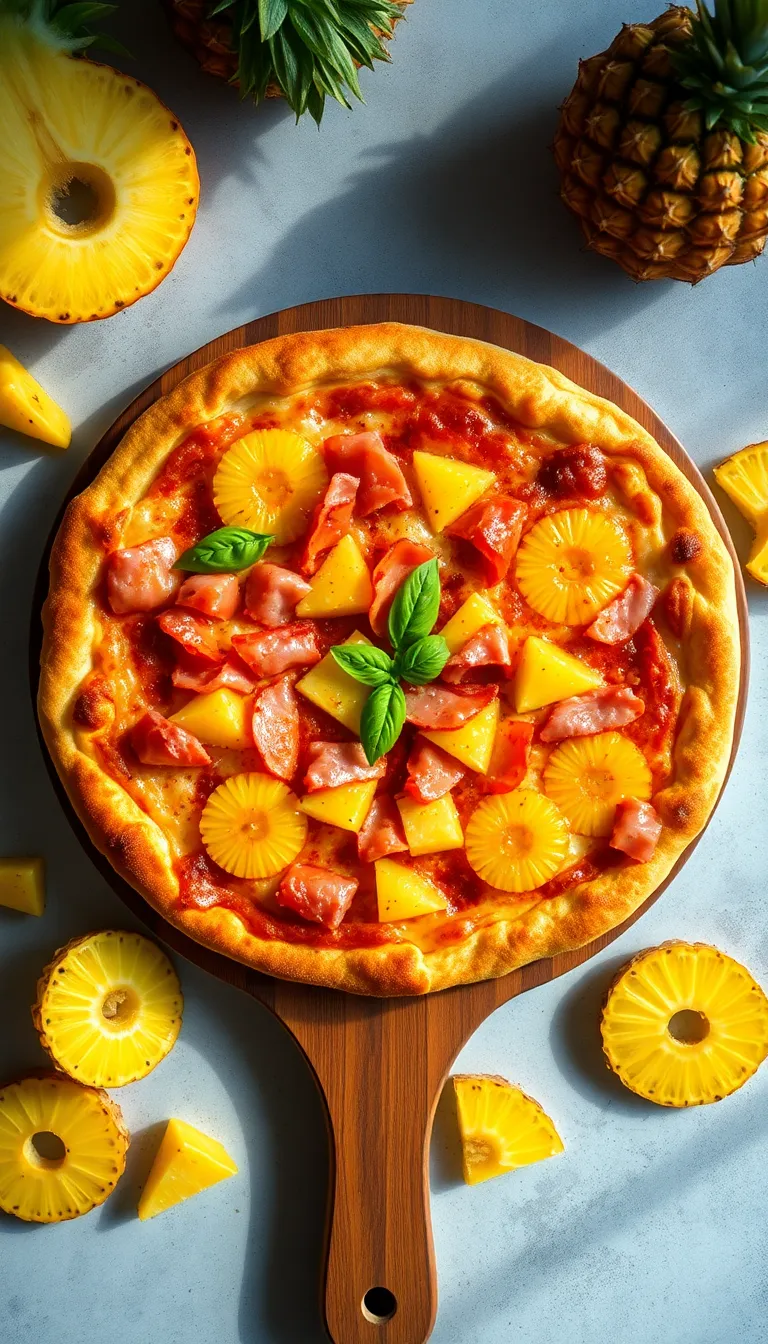
- Sweet and Savory Delight: This Hawaiian pizza perfectly balances the sweetness of pineapple with the savory flavors of ham and cheese, creating a delightful taste that’s truly irresistible.
- Quick and Easy: With just a few simple ingredients and minimal prep time, this recipe is perfect for a busy weeknight dinner or a fun weekend meal.
- Customizable Toppings: You can easily adapt this pizza to suit your taste by adding other toppings like bell peppers, onions, or even jalapeños for a spicy kick.
- Homemade Goodness: Enjoy the satisfaction of making your own pizza from scratch, which not only tastes better but also allows you to control the quality of ingredients.
- Family-Friendly: This recipe is sure to be a hit with both kids and adults, making it a great choice for family gatherings or casual get-togethers.
Why You’ll Love This Recipe
- Perfect balance of sweet and savory: This Hawaiian pizza combines the sweetness of pineapple with the savory taste of ham and cheese, creating a delightful flavor explosion in every bite.
- Quick and easy to make: This recipe allows you to prepare a delicious pizza in under 30 minutes, making it a perfect choice for busy weeknight dinners or impromptu gatherings.
- Customizable toppings: Feel free to add your favorite toppings like bell peppers or onions to personalize your pizza and enhance its flavor to suit your taste preferences.
- Kid-friendly favorite: The combination of familiar ingredients like cheese, ham, and pineapple makes this pizza a hit with children, encouraging them to try new flavors in a fun way.
- Light and refreshing: The juicy pineapple not only adds sweetness but also provides a refreshing contrast, making this pizza a lighter option for those looking to enjoy a satisfying meal without feeling too heavy.
- Homemade goodness: Experience the satisfaction of creating a homemade pizza that tastes just as good, if not better, than takeout, with fresh ingredients and a personal touch.
Ingredients
- 1 pre-made pizza dough (or use homemade for a fresher taste)
- 1/2 cup pizza sauce (store-bought or homemade)
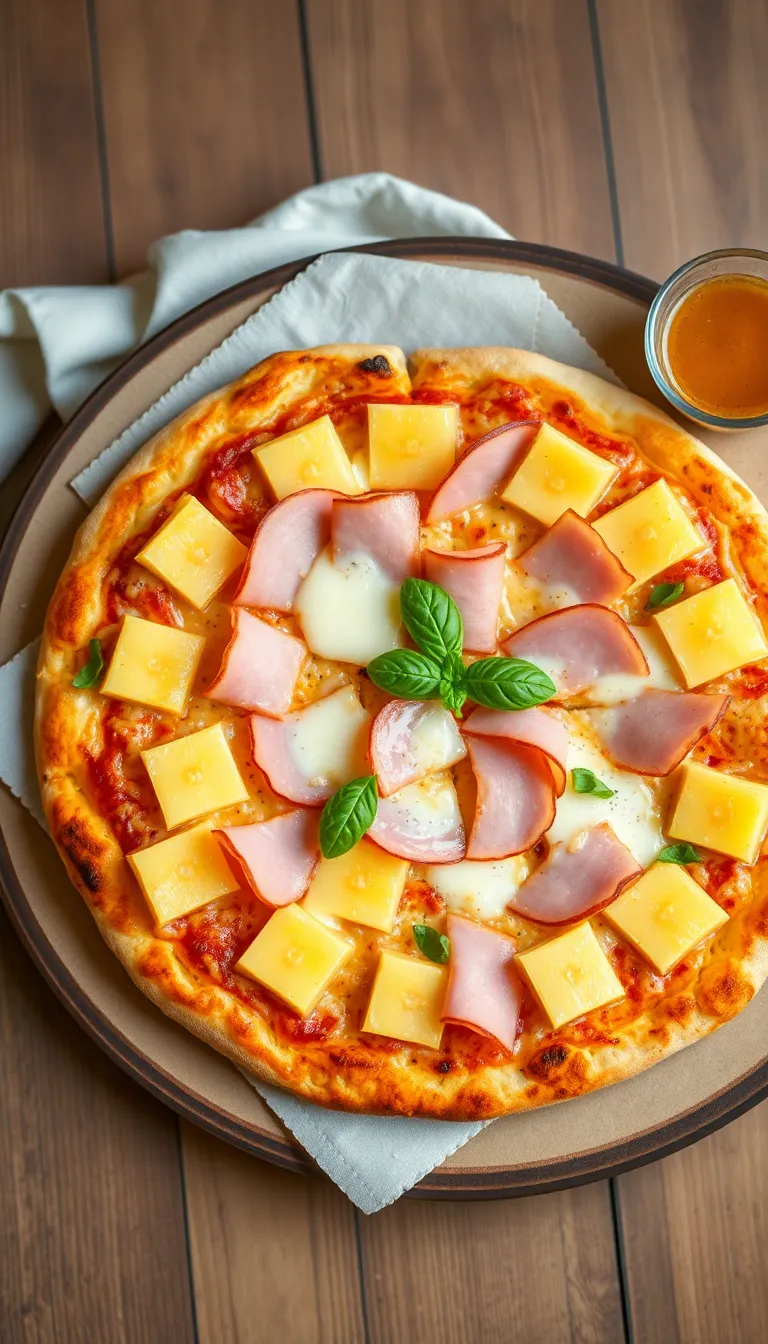
- 1 1/2 cups shredded mozzarella cheese
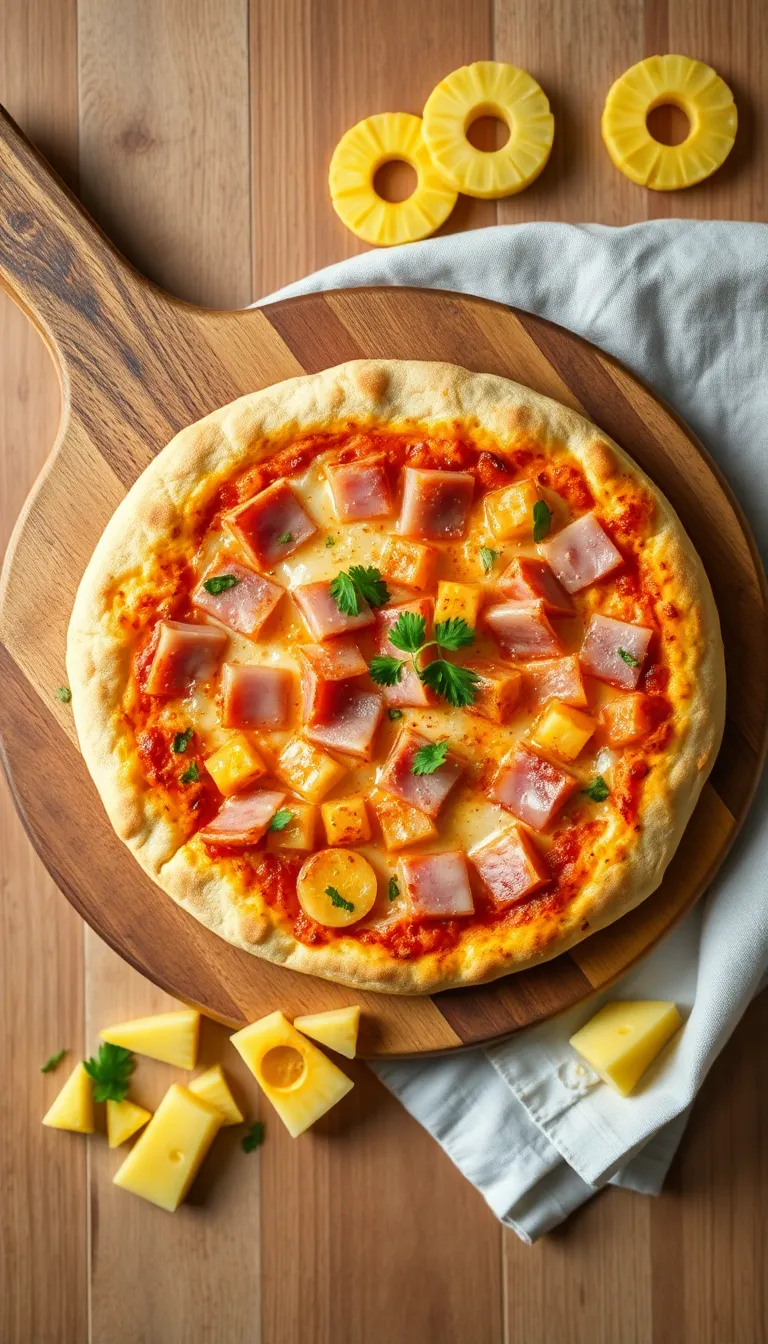
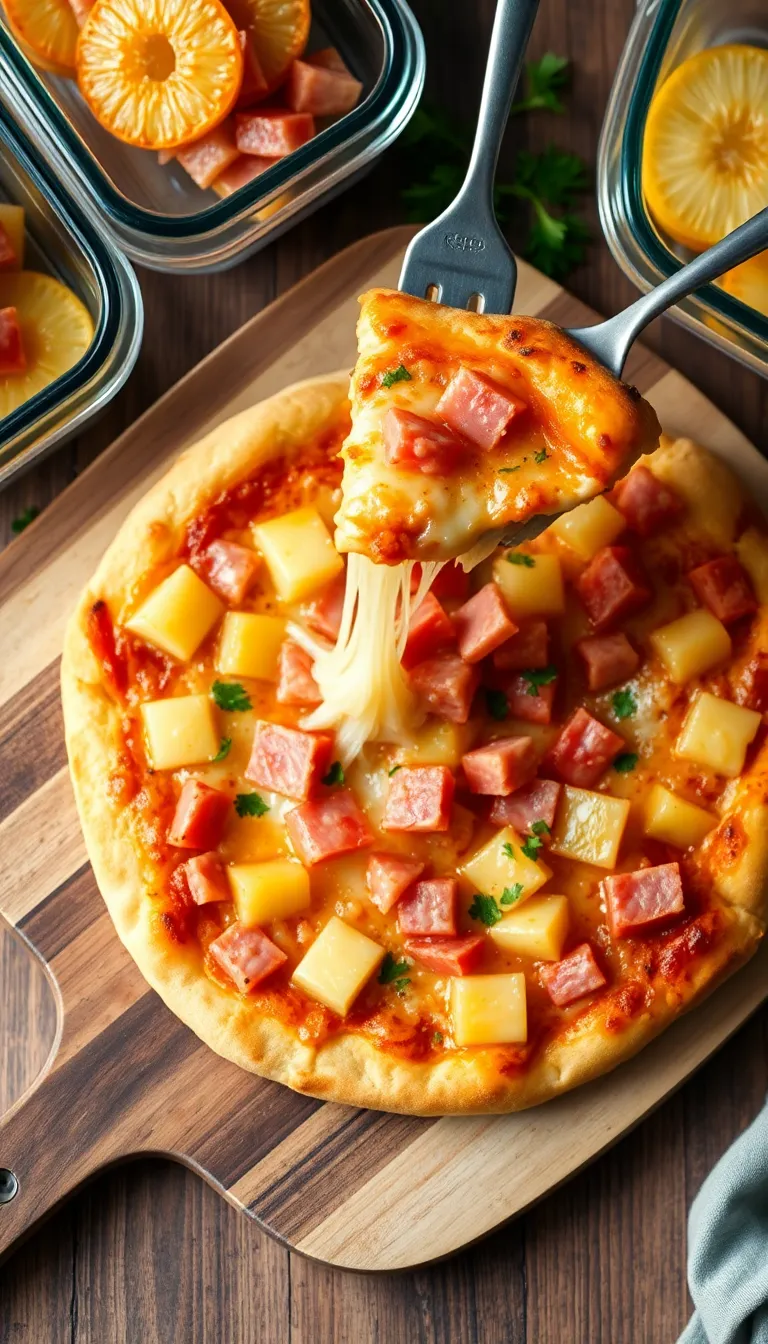
- 1 cup cooked ham, sliced into small pieces
(substitute with Canadian bacon for a different flavor)
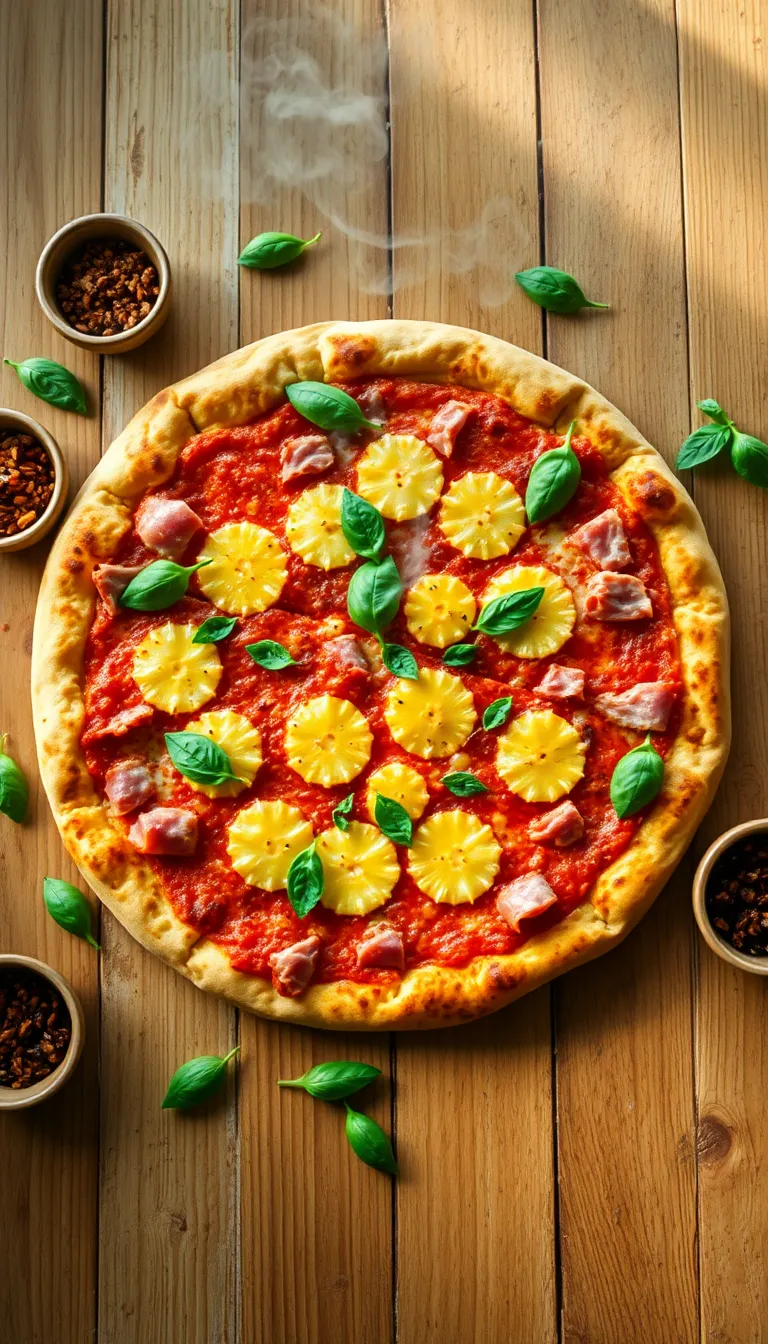
- 1 cup pineapple chunks, drained
(use fresh pineapple for a sweeter taste)
- 1/4 cup sliced red onion (optional)
- 1/2 teaspoon dried oregano
(adds a traditional Italian flavor)
- 1/4 teaspoon red pepper flakes (optional, for a hint of spice)
- 1 tablespoon olive oil
(for brushing the crust)
- 1 tablespoon cornmeal
(for dusting the baking sheet, prevents sticking)
Kitchen Tools You’ll Need
- Pizza Stone or Baking Sheet: Use a pizza stone for a crispier crust. If you don’t have one, a regular baking sheet will work as an alternative.
- Pizza Cutter or Sharp Knife: Essential for slicing the pizza into even pieces after baking.
- Rolling Pin: Helps in rolling out the pizza dough evenly to the desired thickness.
- Mixing Bowl: Needed to combine and knead the pizza dough ingredients.
- Measuring Cups and Spoons: Important for accurately measuring ingredients for the dough and toppings.
- Cheese Grater: If using block cheese, a grater will be needed to shred it for even melting.
- Cutting Board: Provides a safe surface to chop pineapple, ham, and other toppings.
- Oven Mitts: Essential for safely handling hot baking sheets or pizza stones.
Preparation Steps
- Preheat your oven to 475°F (245°C) and place a pizza stone or baking sheet inside to heat up.
- Roll out the pizza dough on a floured surface to your desired thickness, ensuring it’s even for consistent cooking.
- Transfer the rolled dough onto a piece of parchment paper to make it easier to place in the oven later.
- Spread an even layer of tomato sauce over the dough, leaving a 1-inch border around the edges for the crust.
- Sprinkle a generous amount of shredded mozzarella cheese over the sauce, ensuring coverage to the edges.
- Add slices of ham and pineapple chunks evenly across the pizza. Tip: Pat the pineapple dry with a paper towel to remove excess moisture.
- Carefully slide the parchment paper with the pizza onto the heated pizza stone or baking sheet. Bake for 12-15 minutes until the crust is golden brown and the cheese is bubbly and slightly browned.
- Remove the pizza from the oven and let it cool for a few minutes before slicing and serving. Warning: The pizza will be very hot, so use caution when handling.
Final Thoughts: Making a homemade Hawaiian pizza is a delightful experience that brings the sweet and savory flavors of ham and pineapple together. With these precise steps, you can achieve a delicious and perfectly cooked pizza right from your home oven. Enjoy your culinary creation!
Serving Suggestions
- Pair with a Light Salad: Serve your Hawaiian pizza with a crisp green salad dressed in a light vinaigrette. The fresh, tangy flavors of the salad will complement the sweet and savory elements of the pizza.
- Garnish with Fresh Basil: Add a few fresh basil leaves on top of the pizza just before serving. The aromatic basil enhances the pizza’s flavor and adds a touch of color for an appealing presentation.
- Complement with a Tropical Beverage: Enjoy your pizza with a refreshing tropical drink, such as a pineapple or mango smoothie. The fruity beverage mirrors the tropical theme of the pizza and balances its richness.
- Serve with Garlic Breadsticks: Offering garlic breadsticks on the side adds texture and a garlicky contrast to the sweet and savory taste of the pizza. It’s a perfect accompaniment for a complete meal.
- Top with Red Pepper Flakes: For those who enjoy an extra kick, sprinkle some red pepper flakes over the pizza. This simple garnish adds a hint of heat that contrasts beautifully with the sweetness of the pineapple.
- Ideal for Casual Gatherings: Hawaiian pizza is a crowd-pleaser at casual get-togethers. Serve it alongside a selection of other pizzas and allow guests to mix and match their slices for a fun, interactive dining experience.
Pro Tips for Perfect Results
- Preheat Your Pizza Stone: For a perfectly crispy crust, place a pizza stone in your oven and preheat it to the highest temperature for at least 30 minutes before baking your pizza. This step replicates the intense heat of a professional pizza oven.
- Layer Ingredients Strategically: To avoid a soggy pizza, add a thin layer of sauce, followed by cheese, and then the pineapple and ham. This order helps prevent the juices from the toppings from soaking into the crust.
- Use Fresh Pineapple: For the best flavor and texture, opt for fresh pineapple instead of canned. Fresh pineapple offers a natural sweetness and a slight crunch that elevates the overall taste.
- Make Dough in Advance: Prepare your pizza dough the day before and let it cold ferment in the refrigerator. This allows the flavors to develop further, resulting in a more flavorful and airy crust.
- Brush the Crust with Garlic Butter: Just before serving, brush the crust with melted butter mixed with minced garlic and a pinch of salt. This adds a savory depth and a glossy finish to the pizza.
- Finish with Fresh Herbs: Once the pizza is baked, sprinkle it with fresh chopped basil or oregano for a burst of freshness and color that complements the sweet and savory toppings.
Common Mistakes to Avoid
- Overloading the Pizza with Toppings: It’s tempting to add extra toppings for flavor, but too many can lead to a soggy crust. To avoid this, use a moderate amount of each topping and spread them evenly. This ensures the crust bakes properly and stays crisp.
- Using Cold Dough: Cold dough can be difficult to stretch and may result in uneven cooking. Allow the dough to come to room temperature before rolling it out. This makes it more pliable and helps achieve an even thickness for better baking.
- Skipping Preheating the Oven: Baking pizza in an oven that isn’t fully preheated can lead to uneven cooking. Always preheat your oven to the recommended temperature before placing the pizza inside. This ensures the crust cooks evenly and the cheese melts properly.
- Incorrect Cheese Placement: Placing cheese directly on the crust can prevent it from crisping up. To avoid this, spread a thin layer of sauce first, then add cheese and toppings. This order helps the crust bake evenly and keeps the cheese from burning.
- Not Draining the Pineapple: Excess moisture from undrained pineapple can make the pizza soggy. Always drain canned pineapple thoroughly before using it as a topping. Patting it dry with a paper towel can further reduce moisture and help maintain a crispy crust.
- Underbaking the Pizza: Removing the pizza too early from the oven can result in an undercooked crust. To ensure it’s fully baked, keep an eye on the edges and the bottom of the crust. It should be golden brown and firm to the touch. Consider using a pizza stone to help achieve a crispier base.
Final Thoughts: Creating the perfect Hawaiian pizza at home can be a satisfying experience when you avoid these common pitfalls. Paying attention to dough handling, oven temperature, and topping placement will yield a deliciously crispy and flavorful pizza every time.
Storage and Reheating Tips
- Refrigeration: Store leftover Hawaiian pizza in an airtight container or wrap it tightly with aluminum foil or plastic wrap. This helps prevent the pizza from drying out.
- Refrigeration Timeframe: Keep the pizza in the refrigerator for up to 3-4 days. Beyond this, the quality and safety of the pizza may decline.
- Freezing: If you want to store the pizza for a longer period, place slices in a single layer on a baking sheet and freeze them until solid. Once frozen, transfer the slices to a freezer-safe, airtight container or a heavy-duty freezer bag. Label with the date and consume within 1-2 months for best quality.
- Reheating in the Oven: Preheat your oven to 375°F (190°C). Place the pizza slices on a baking sheet and cover them loosely with aluminum foil to prevent drying. Heat for about 10-15 minutes or until the cheese is bubbly and the crust is warm.
- Reheating in a Skillet: Heat a non-stick skillet over medium heat. Place the pizza slices in the skillet, cover with a lid, and heat for 5-8 minutes. This method helps keep the crust crisp while warming the toppings.
- Avoid the Microwave: While convenient, using a microwave can make the crust soggy. If microwave reheating is your only option, place a mug of water in the microwave with the pizza slice to help maintain moisture balance.
- Food Safety: Ensure that the pizza reaches an internal temperature of 165°F (74°C) when reheating to kill any potential bacteria and ensure safe consumption.
Proper storage and reheating techniques are crucial for maintaining the delicious taste and texture of your Hawaiian pizza. By following these guidelines, you can enjoy your leftovers with the same quality as when they were freshly made.
Frequently Asked Questions
Q: Can I use a different type of cheese instead of mozzarella for Hawaiian pizza?
- You can substitute mozzarella with provolone, cheddar, or a blend of Italian cheeses for a different flavor profile.
Q: What is the best way to prevent the pizza crust from becoming soggy?
- To avoid a soggy crust, pre-bake the crust for 5-7 minutes before adding toppings and ensure pineapple is well-drained.
Q: Can I use fresh pineapple instead of canned for this recipe?
- Yes, fresh pineapple can be used and will add a brighter, more natural flavor to the pizza.
Q: How can I make the pizza dough from scratch if I don’t want to use store-bought dough?
- Combine flour, yeast, water, olive oil, and salt, then knead until smooth and let it rise for at least 1 hour before using.
Q: Is there a way to make this pizza healthier?
- For a healthier version, use a whole wheat crust and opt for low-fat cheese and lean ham.
Q: What should I do if my pizza toppings are not cooking evenly?
- Ensure toppings are evenly distributed and consider rotating the pizza halfway through baking for even cooking.
Final Thoughts
This Hawaiian Pizza recipe is a delightful fusion of savory and sweet, combining classic ingredients like ham and pineapple for a unique taste that stands out. The crispy crust paired with gooey cheese and vibrant toppings makes this pizza a truly special treat for your taste buds. It’s a must-try for anyone looking to spice up their pizza night with a tropical twist.
Don’t hesitate to make this recipe your own by experimenting with different toppings or adding your favorite herbs. Cooking is all about creativity and personalization, so feel free to explore and add your signature touch. Gather your loved ones and enjoy the process of crafting a homemade pizza together.
We warmly invite you to experience the joy of making and tasting this Hawaiian Pizza. Whether you’re a seasoned cook or a beginner, this recipe is sure to bring smiles to your table. Happy cooking!

I’m Jonny, the cook, writer, and food lover behind this flavorful corner of the internet. Whether it’s a sizzling weeknight stir-fry, a no-bake dessert that saves the day, or a comforting Sunday classic — this blog is where I share recipes that are bold, doable, and made to impress without the stress.