
Focusing on the overlooked joy of perfectly timing garlic butter lobster to achieve a rich, fragrant crust that’s both crispy and buttery, elevating the simple luxury of lobster into a memorable, hands-on experience.
Getting that balance right—crispy on the outside, tender and juicy inside—takes a bit of patience and attention, but it’s worth every second. The aroma of garlic and butter filling the kitchen as the lobster cooks is pure, irresistible comfort.
This recipe isn’t just about the taste—it’s about the process, the small wins of timing each step just right, and the satisfying crack of that buttery crust. It’s a dish that makes you slow down and really enjoy every bite.
Focusing on the overlooked joy of perfectly timing garlic butter lobster to achieve a rich, fragrant crust that’s both crispy and buttery, elevating the simple luxury of lobster into a memorable, hands-on experience.
The story behind this recipe
- I first stumbled on this lobster recipe during a chaotic summer dinner with friends. We were all rushing, plates flying, but I kept thinking about how the lobster’s rich, buttery aroma could somehow slow down the madness. It was that moment I realized a simple, well-timed crust could turn a hectic meal into a shared celebration of good food.
- Ever since, I’ve been chasing that perfect balance—crisp on the outside, tender inside, with garlic butter that shimmers and clings. It’s become my go-to for lazy weekends or when I want to impress without fuss. The smell of garlic and butter filling the kitchen is a small reminder that the best moments are often simple and unpretentious.
- This dish is about the little details—getting that crust just right, making sure the lobster stays juicy, and savoring every fragrant bite. It’s not fancy, but it’s honest, satisfying, and reminds me why I love cooking at home.
Ingredient breakdown: key components
- Lobster tail: Fresh lobster is key, its sweet, tender flesh needs minimal fuss to shine. Look for bright, firm shells—avoid anything dull or soft.
- Garlic: I love crushing fresh garlic; it releases a fragrant oil that infuses the butter. Use plenty, and don’t skimp—more garlic equals more flavor.
- Butter: Unsalted butter is my go-to for control over saltiness. It melts into a glossy, aromatic pool—use high-quality for richness that coats each bite.
- Olive oil: Just a touch to prevent sticking and add a subtle fruitiness. Keep the heat moderate so the oil doesn’t burn and turn bitter.
- Lemon: Bright, zesty lemon juice cuts through the richness—squeeze fresh before serving. It’s that final zing that elevates the dish.
- Parsley: Fresh parsley adds a herbal brightness—chop it fine and sprinkle at the end for color and freshness. It’s a small touch that makes a big difference.
- Paprika (optional): Smoked paprika adds a hint of smoky warmth—sprinkle a pinch for depth, especially if your lobster isn’t as fresh as you’d like.
Spotlight on key ingredients
Lobster Tail:
- Its firm, bright shell hides tender, sweet flesh that needs minimal fuss to shine. Look for shiny, unblemished shells and avoid dull, soft ones.
- Lobster: Freshness is everything—alive or just recently cooked. The meat should jiggle slightly and have a clean, oceanic aroma with a slightly sweet bite.
Garlic:
- Crushing fresh garlic releases a pungent, fragrant oil that infuses the butter. Its aroma intensifies as it cooks, becoming sweet and nutty—use plenty for depth.
- During cooking, it softens, turning golden and aromatic. Avoid burning—keep the heat moderate and stir frequently for that rich, savory scent.
Notes for ingredient swaps
- Dairy-Free: Swap butter for coconut oil or a dairy-free butter alternative. Expect a slightly different richness and flavor profile, but the coconut aroma can add an interesting twist.
- Lobster Alternative: Use large langoustines or king prawns if lobster isn’t available. They cook faster and have a different texture, but still deliver that seafood indulgence.
- Garlic: Roast or sauté garlic cloves beforehand to mellow their sharpness, or substitute with garlic powder—less pungent but still aromatic.
- Herbs: Replace parsley with cilantro or chives for a different herbal note. Fresh herbs always brighten the dish, so add just before serving.
- Lemon: Use bottled lemon juice in a pinch, but fresh lemon zest and juice give a cleaner, more vibrant zing that cuts through the butter.
- Butter: Olive oil or avocado oil can be used in a pinch, but they lack the creaminess and flavor depth of butter. Expect a lighter, less rich finish.
- Paprika: Smoked paprika adds depth; if unavailable, a pinch of cayenne can add warmth and a subtle smoky hue, or skip entirely for pure garlic butter.
Equipment & Tools
- Sharp boning knife: To score and carefully prep the lobster shell and meat.
- Baking sheet with wire rack: Ensures even heat distribution and crispy edges.
- Basting brush: To coat the lobster with garlic butter during baking.
- Small saucepan: To melt and infuse garlic butter.
Step-by-step guide to garlic butter lobster
- Equipment & Tools: Gather a sharp boning knife, a baking sheet with a wire rack, a basting brush, and a small saucepan. The knife helps score and prep, the rack ensures even cooking, the brush for butter, and the saucepan for melting butter.
- Preheat your oven to 200°C (390°F). Line the baking sheet with foil for easy cleanup and set the wire rack inside.
- Prepare the lobster: Use the boning knife to cut down the shell along the top, from the base to the tail tip, avoiding the meat. Carefully lift the shell open, exposing the flesh. Gently loosen the meat from the shell, leaving the tail end attached.
- Score the meat: Make shallow cuts across the top of the lobster flesh in a crisscross pattern. This helps the butter penetrate and promotes crispy edges.
- Make garlic butter: In the small saucepan, melt ½ cup unsalted butter over medium heat. Add 4 minced garlic cloves. Cook until fragrant, about 1-2 minutes, then remove from heat.
- Brush the lobster: Lay the lobster on the rack. Generously brush the exposed meat with the garlic butter, ensuring the scored surface is coated. Reserve some butter for basting during baking.
- Bake & baste: Place in the oven. Bake for 12-15 minutes, or until the meat turns opaque and edges start to crisp. Baste every 5 minutes with remaining garlic butter for extra flavor and moisture.
- Finish with butter & herbs: Remove from oven. Brush with any remaining garlic butter. Sprinkle with chopped parsley and a squeeze of lemon for brightness.
- Rest briefly: Let the lobster rest for 2 minutes before serving. This allows juices to settle and flavors to deepen.
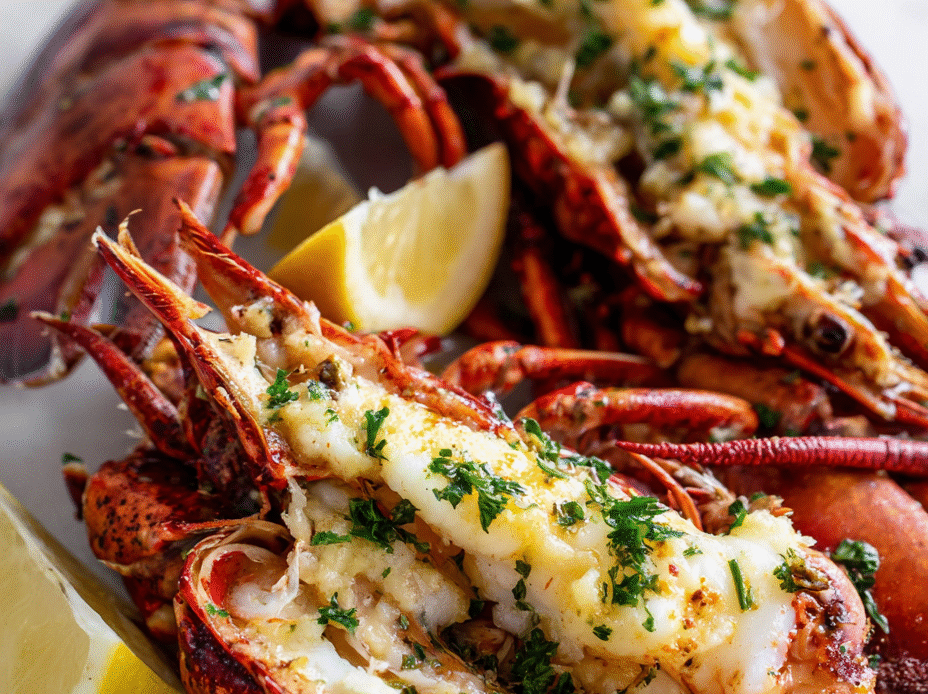
- Serve hot, with extra lemon wedges on the side for squeezing. The crust should be golden, fragrant with garlic, and the meat tender and juicy.
Let the lobster rest for 2 minutes to settle juices. Plate with extra lemon wedges and sprinkle parsley. Serve immediately for the best crispy, buttery experience.
How to Know It’s Done
- Lobster meat is opaque and firm, not translucent.
- Crust is golden and slightly crispy at the edges.
- Garlic butter is fragrant, bubbling, and coats the meat evenly.

Garlic Butter Lobster
Ingredients
Equipment
Method
- Gather all your tools: a boning knife, baking sheet with wire rack, basting brush, and a small saucepan. Preheat your oven to 200°C (390°F) and line the baking sheet with foil for easy cleanup, placing the wire rack inside.
- Use the boning knife to carefully cut down along the top of each lobster tail shell, from the base to the tip, avoiding the meat. Gently lift the shell open and loosen the meat from the shell, keeping the tail attached at the end.
- Make shallow crisscross cuts across the top of the lobster meat. This helps the garlic butter seep in and promotes crispy edges once baked.
- In the small saucepan, melt the butter over medium heat. Add the crushed garlic cloves and cook until fragrant, about 1-2 minutes, until the butter is bubbling slightly and filling the air with a rich aroma. Remove from heat.
- Place the lobster tails on the wire rack. Using a basting brush, generously coat the exposed meat with the garlic butter, making sure to get into the scored cuts for maximum flavor.
- Transfer the lobster to the oven and bake for about 12-15 minutes, until the meat turns opaque and edges start to crisp. Every 5 minutes, baste the lobster with the remaining garlic butter to keep it moist and enhance the crust.
- Once cooked, remove the lobster from the oven. Squeeze fresh lemon juice over the meat and sprinkle with chopped parsley and a pinch of paprika for color and flavor.
- Let the lobster rest for 2 minutes to allow the juices to redistribute. Serve hot with extra lemon wedges on the side for squeezing, and enjoy the crispy, fragrant crust paired with juicy, tender lobster meat.
Pro tips for perfect lobster
- Use a hot pan—start with medium-high heat to get that sizzle immediately, ensuring a crispy crust.
- Don’t overcrowd the pan—give each lobster tail space to breathe and crisp evenly.
- Baste generously and often—frequent butter brushing keeps the meat juicy and enhances that golden crust.
- Score the lobster meat lightly—this helps the garlic butter penetrate and promotes even browning.
- Watch the garlic butter carefully—keep it moving and don’t let it burn, or it’ll turn bitter.
- Rest the lobster briefly after baking—allow juices to redistribute for maximum tenderness and flavor.
- Finish with a squeeze of lemon—brightens the richness and heightens the buttery aroma.
Common mistakes and how to fix them
- FORGOT to pat lobster dry before cooking → Results in steaming, not crisp. Pat dry thoroughly.
- DUMPED too much butter in pan initially → Causes splatter; add butter gradually for control.
- OVER-TORCHED the garlic butter → Burns quickly, turning bitter. Keep heat moderate, watch closely.
- MISSED the resting step → Resting 2 minutes keeps juices in and prevents rubbery texture.
Quick fixes for lobster perfection
- When sauce shimmers and smells fragrant, it’s ready to baste the lobster.
- Splash cold water on pan if butter starts to burn—cool it down quickly.
- Patch over a crackling butter pan with a metal shield or lid to contain splatters.
- If lobster is undercooked, return to oven for 2-minute bursts until opaque and firm.
- Swap olive oil for clarified butter if you want a cleaner, less smoky finish.
Prep, store, and reheat tips
- Prep the lobster tails: Score and clean them up to 24 hours ahead, keeping them chilled in the fridge. The garlic butter can be made 1 day in advance and stored in a jar in the fridge, where it will slowly develop a richer aroma.
- Storage: Keep raw lobster in its shell wrapped tightly in plastic in the coldest part of your fridge. Cooked lobster can be refrigerated for up to 2 days in an airtight container, with a slight loss in freshness and aroma.
- Reheating: Gently warm cooked lobster in a covered skillet over low heat, or briefly in the oven at 150°C (300°F). Watch for a change in texture—meat should remain tender, not rubbery. Reheat until fragrant and just warmed through, about 5–7 minutes.
- Sensory notes: The aroma should be subtly garlic-briny, and the meat moist and tender. Over-reheating may dry out the lobster or cause the garlic butter to burn or smell overly roasted.
Top questions about garlic butter lobster
1. Can I use frozen lobster tails?
Use fresh lobster tails if possible; they’re firm, bright, and smell like the ocean. Frozen can work, but thaw fully and pat dry first.
2. Can I swap regular butter for clarified butter?
Yes, you can substitute clarified butter for regular butter for a cleaner, less foamy finish. The flavor stays rich, but it’s less creamy.
3. How do I know when lobster is cooked?
Overcooking makes the lobster tough and rubbery. Look for an opaque, firm texture, about 12-15 minutes in the oven, depending on size.
4. Why score the lobster meat?
Use a sharp knife to score the meat lightly—this helps the garlic butter penetrate and creates crispy edges when baked.
5. How much garlic should I use?
Fresh garlic releases a pungent, fragrant oil that infuses the butter. Use 4-6 cloves, crushed or minced, for the best flavor.
6. Should I rest the lobster after cooking?
The lobster should rest for about 2 minutes after baking. This lets the juices redistribute, keeping the meat tender and juicy.
7. Why use a wire rack?
Use a wire rack on your baking sheet to ensure even heat and crispy edges. Avoid overcrowding so the lobster cooks evenly.
8. Can I skip the lemon?
Add a squeeze of fresh lemon just before serving; it brightens the richness of the garlic butter and enhances the seafood flavor.
9. What if the garlic butter burns?
If the garlic butter starts to burn, lower the heat or add a splash of water to cool the pan and prevent bitterness.
10. How do I store and reheat leftovers?
Leftover cooked lobster can be stored in the fridge for up to 2 days. Reheat gently in a covered skillet or oven, watching for over-drying.
Cooking this garlic butter lobster tail is more than just a meal, it’s a small ritual of patience and joy. The aroma alone—rich butter, pungent garlic, a hint of lemon—reminds me why I love working with seafood. It’s simple, honest, and deeply satisfying to get each step just right.
In the end, it’s about the balance—crispy crust, juicy meat, and bright, fragrant butter. Every time I make it, I feel a little more connected to the process and the flavors that make seafood so special. It’s a dish that keeps inviting me back, season after season.

Hi, I’m Jonny Andrew Miller, the cook, taster, and slightly messy mind behind Bite & Boom. I live in Austin, Texas, a city that smells like barbecue smoke, fresh tortillas, and late-night tacos if you wander long enough. It suits me.
