
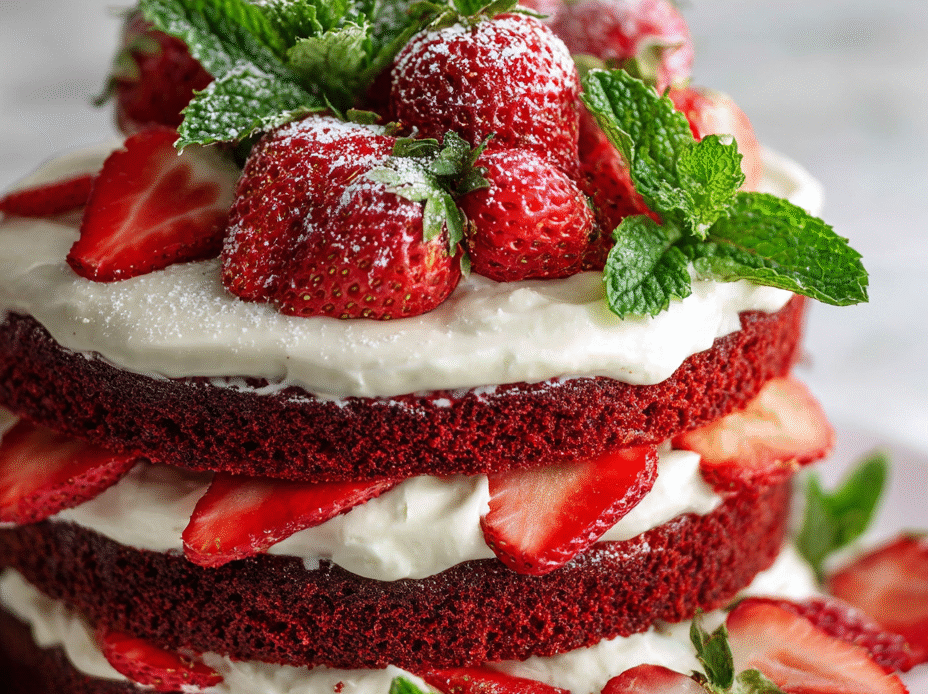
This Red Velvet Strawberry Cake is my twist on a classic, blending the deep cocoa richness of red velvet with the bright, juicy burst of fresh strawberries. It’s not your everyday layered cake; I love how the tartness of strawberries cuts through the sweetness, giving it a lively, refreshing edge. It’s a cake that feels both indulgent and lively, perfect for spring or summer when berries are at their best.
I stumbled onto this combo one lazy afternoon, experimenting with what happens if I pair chocolate’s deep warmth with the natural zing of ripe strawberries. The result was unexpectedly vibrant, almost like a celebration in every bite. It’s become a go-to for birthdays and family gatherings, where I want something that’s familiar but also a little surprising. It’s a cake that makes me smile just thinking about how the flavors dance together.
Focusing on the harmony of vibrant red velvet and fresh strawberries, this cake celebrates the unexpected pairing of rich cocoa and bright fruit, making it a perfect centerpiece for spring gatherings or those summer weekends when strawberries are at their sweetest.
Inspiration Behind the Cake
One summer, I was reminiscing about childhood birthdays filled with the sweet scent of strawberries and the rich aroma of chocolate cake. That memory stuck with me, but I wanted to create something that felt fresh and a little more grown-up. When I combined the deep cocoa flavor of red velvet with the bright, juicy tang of strawberries, it was like capturing that childhood joy but in a more sophisticated way. Now, I keep coming back to this cake whenever I need a little celebration that feels personal and bright.
Key Ingredients Breakdown
- Cream Cheese: I love how its tangy richness balances the cake’s sweetness; make sure it’s softened for smooth mixing, or you’ll get lumps—aim for a velvety texture.
- Strawberries: Fresh, plump berries add that juicy pop I crave; opt for ripe, fragrant berries that smell like summer—frozen work in a pinch, just thaw and drain well.
- Red Velvet Cake Flour: This special flour gives the cake its tender crumb and vibrant color; if unavailable, mix all-purpose with a touch of cornstarch—just don’t skip the cocoa powder for depth.
- Cocoa Powder: Unsweetened, of course—it’s the backbone of that deep, earthy cocoa flavor; sift it with dry ingredients to avoid clumps and ensure a smooth batter.
- Buttermilk: Its acidity keeps the crumb tender and moist; if you don’t have buttermilk, whisk a tablespoon of lemon juice or vinegar into regular milk—wait five minutes before using.
- Granulated Sugar: I prefer fine sugar for a more even sweetness; if you only have coarse, give it a quick pulse in the food processor, so it dissolves seamlessly.
- Eggs: Fresh, large eggs make the batter rich and help with structure; room temperature eggs blend more uniformly, so take them out 30 minutes before mixing.
Spotlight on key ingredients
Cream Cheese & Strawberries:
- Cream Cheese: I love its tangy richness that balances the sweetness; make sure it’s softened for smooth mixing, or you’ll get lumps—aim for a velvety texture.
- Strawberries: Fresh, plump berries add that juicy pop I crave; opt for ripe, fragrant berries that smell like summer—frozen work in a pinch, just thaw and drain well.
Notes for ingredient swaps
- Dairy-Free: Swap cream cheese for coconut cream cheese. It’s richer and a bit sweeter, but still tangy enough for frosting.
- Gluten-Free: Use a blend of almond flour and gluten-free baking mix. The texture will be slightly denser but still moist.
- Vegan: Replace eggs with unsweetened applesauce or flaxseed meal; use plant-based butter and dairy-free cream cheese.
- Sugar Alternatives: Substitute with erythritol or coconut sugar; expect a slightly different sweetness profile and texture.
- Strawberries: Use frozen strawberries if fresh aren’t available. Thaw and drain well to avoid excess moisture.
- Food Coloring: Use beet juice or natural red powder instead of artificial dye; flavor remains subtle, color may vary.
- Cake Flour: Replace with all-purpose flour plus 2 tablespoons cornstarch per cup; keep the batter light and tender.
Equipment & Tools
- Oven: Bake the cake layers evenly.
- Cake pans: Shape and contain the batter during baking.
- Mixing bowls: Combine dry and wet ingredients separately.
- Electric mixer: Cream butter and sugar smoothly, incorporate eggs.
- Spatula: Smooth batter and fold ingredients gently.
- Wire racks: Cool the baked layers evenly.
- Knife (warm): Slice the cake cleanly after chilling.
Step-by-step guide to Red Velvet Strawberry Cake
- Preheat your oven to 175°C (350°F). Grease two 20cm (8-inch) round cake pans and line them with parchment paper. Gather your mixer, spatula, and cooling racks.
- In a bowl, sift together 2 1/2 cups (310g) cake flour, 2 tbsp (15g) unsweetened cocoa powder, 1 tsp (5g) baking soda, and 1/2 tsp (2.5g) salt. Set aside.
- In a large mixing bowl, beat 1/2 cup (115g) softened butter with 1 3/4 cups (350g) sugar until fluffy, about 3 minutes. Add 2 large eggs one at a time, beating well after each.
- Mix in 1 oz (28g) red food coloring and 1 tsp (5ml) vanilla extract. Scrape down the sides. Alternately add dry ingredients and 1 cup (240ml) buttermilk, starting and ending with dry, in 3 additions. Mix until just combined.
- Divide batter evenly between pans. Smooth tops with spatula. Bake for 25-30 minutes, or until a toothpick inserted in the center comes out with moist crumbs. The edges should pull slightly from the sides.
- Remove from oven and let cool in pans for 10 minutes. Then transfer to wire racks to cool completely, about 1 hour. Meanwhile, prepare your strawberry filling and frosting.
- For the strawberry filling, hull and slice 1 cup (150g) fresh strawberries. Gently mash or pulse in a food processor until slightly chunky. Mix with 2 tbsp (25g) sugar and a squeeze of lemon juice. Chill until ready.
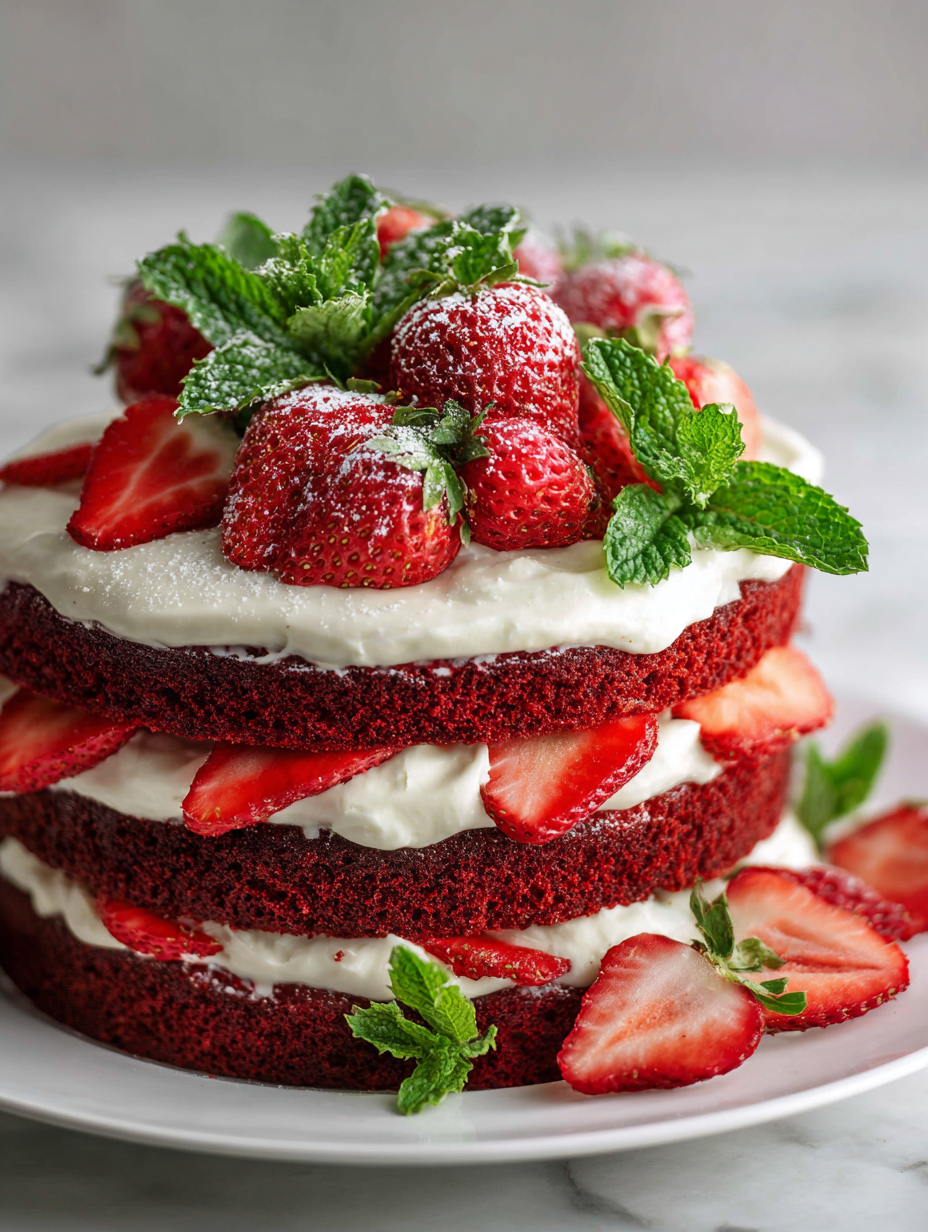
- To assemble, place one cake layer on a plate. Spread a layer of strawberry compote, then a generous layer of cream cheese frosting. Top with the second layer, then frost the sides and top with more frosting.
- Decorate with halved strawberries or edible flowers if desired. Let the assembled cake rest in the fridge for at least 30 minutes to set the frosting.
- Before slicing, ensure the cake is fully chilled. Use a sharp knife warmed slightly under hot water for clean cuts. Serve with a fresh strawberry on top for a burst of color and flavor.
Allow the assembled cake to rest in the fridge for at least 30 minutes to set the frosting. Before serving, bring to room temperature for better flavor and texture. Slice with a warm knife for clean cuts, and garnish with fresh strawberries or edible flowers for a pretty finish.
How to Know It’s Done
- Cake edges are slightly pulled from the sides, indicating doneness.
- Toothpick inserted in the center comes out with moist crumbs but no wet batter.
- Cake feels springy and cool to the touch when fully baked.
Red Velvet Strawberry Cake
Ingredients
Equipment
Method
- Preheat your oven to 175°C (350°F). Grease two 20cm (8-inch) round cake pans and line the bottoms with parchment paper. Gather your mixing bowls and tools.
- Sift together the cake flour, cocoa powder, baking soda, and salt in a bowl. Set this dry mixture aside.
- In a large mixing bowl, beat the softened butter and sugar with an electric mixer until the mixture is light, fluffy, and pale, about 3 minutes. This fills the air with a sweet, buttery aroma.
- Add the eggs one at a time, beating well after each addition to ensure they are fully incorporated.
- Mix in the vanilla extract and red food coloring until the batter is uniformly vibrant and bright red.
- Alternately add the dry ingredients and buttermilk to the wet mixture, starting and ending with the dry. Mix until just combined, being careful not to overmix to keep the sponge tender.
- Divide the batter evenly between the prepared pans, smoothing the tops with a spatula. Bake for 25-30 minutes, until a toothpick inserted in the center comes out with moist crumbs and the edges pull slightly away from the sides.
- Remove the cakes from the oven and let them cool in the pans for about 10 minutes. Then, transfer them to wire racks to cool completely, approximately 1 hour.
- Meanwhile, hull and slice the strawberries. Toss them with sugar and a squeeze of lemon juice, then mash or pulse lightly to create a chunky strawberry filling. Chill until needed.
- In a bowl, beat the softened cream cheese and butter until smooth and creamy. Gradually add powdered sugar, beating until fluffy and spreadable.
- Place one cake layer on a serving plate. Spread a layer of strawberry filling over it, then top with a generous amount of cream cheese frosting. Place the second layer on top and frost the entire cake with the remaining frosting. Decorate with halved strawberries or edible flowers if desired.
- Refrigerate the cake for at least 30 minutes to set the frosting. Before slicing, warm a knife in hot water, wipe dry, and cut clean slices. Serve with fresh strawberries for a beautiful presentation.
Pro tips for perfect Red Velvet Strawberry Cake
- Use room temperature eggs for smoother incorporation and better rise.
- Sift your cocoa and flour together to avoid lumps and ensure even color.
- When folding strawberries into the batter, do it gently to keep the fruit intact and moist.
- For a glossy finish on the frosting, beat it until smooth and slightly fluffy.
- Keep an eye on the oven; red velvet cakes can overbake quickly, causing dryness.
- Chill the assembled cake before slicing to set the frosting and make clean cuts.
- Use a warm knife for slicing to prevent tearing and get neat pieces.
Common mistakes and how to fix them
- FORGOT to check oven temperature → Use an oven thermometer for accuracy.
- DUMPED the batter into pans without smoothing → Always level the batter for even layers.
- OVER-TORCHED the edges → Cover with foil if edges brown too quickly.
- MISSED the cooling time → Fully cool layers before frosting to prevent sliding.
Quick fixes for cake mishaps
- When the cake cracks, splash a bit of frosting over the surface to hide it.
- If the strawberries are too watery, pat them dry with a paper towel before adding.
- Dumped the batter too thick? Thin it with a splash of milk for easier pouring.
- Over-torched the edges? Cover with foil and lower oven temp 5°C/10°F next time.
- Shield the cake with foil if the top browns too quickly before center is set.
Prep, store, and reheat tips
- Prepare the cake layers a day in advance; wrap tightly in plastic and store at room temperature for up to 24 hours, keeping them moist and fresh.
- Make the strawberry filling and frosting a day ahead; keep in airtight containers in the fridge for up to 2 days, the flavors deepening overnight.
- Refrigerate the assembled cake for at least 30 minutes before serving to set the frosting and enhance flavor; bring to room temp for better taste and texture.
- To reheat or soften, place slices in the microwave for 10-15 seconds; the cake should be moist and fragrant, strawberries juicy, and frosting creamy.
- Cake keeps well in the fridge for up to 3 days; flavors meld and the berries release their juice, making each bite more vibrant, but consume sooner for best texture.
Top questions about Red Velvet Strawberry Cake
1. Can I use frozen strawberries?
Use fresh strawberries for the best flavor and juiciness. Frozen can work, but thaw and drain them well to avoid excess moisture.
2. Can I make the filling ahead?
Yes, but thaw and drain them thoroughly. Fresh berries give a brighter, juicier burst, but frozen are a fine backup.
3. How far in advance can I make the cake?
Bake the layers the day before and store wrapped at room temperature. Assemble and frost just before serving for freshness.
4. Should I refrigerate the cake after assembling?
Ensure the cake is completely cooled before frosting to prevent melting or sliding. Chill the assembled cake to set the frosting.
5. Can I substitute eggs?
Yes, using room temperature eggs helps incorporate air and creates a tender crumb. Cold eggs can cause batter to be lumpy.
6. How do I get clean slices?
Use a warm knife for clean slicing. Run it under hot water, wipe dry, then cut for neat, even pieces.
7. How do I tell when the cake is done?
Adjust the baking time slightly if your oven runs hot or cold. Start checking around 25 minutes for doneness.
8. Can I make this dairy-free?
Yes, you can replace cream cheese with coconut cream cheese for a dairy-free version. It will be slightly sweeter and richer.
9. Can I use natural coloring?
Artificial food coloring is common, but natural alternatives like beet juice can be used. Expect slight color variation.
10. Can I substitute the cocoa powder?
Yes, you can swap out cocoa powder for cacao if you prefer a more intense chocolate flavor, but it may be slightly bitter.
This cake isn’t just about pretty layers and bright flavors; it’s a reminder that simple ingredients can create something truly special. The combination of cocoa and strawberries feels like a celebration of spring’s fleeting sweetness, perfect for making memories or just treating yourself. Every slice is a little reminder that baking can be honest, messy, and deeply satisfying.
In the end, it’s the small details—like a perfectly smooth frosting or a juicy strawberry—that make this cake feel personal. Sharing it with loved ones brings a bit of joy and chaos, but always leaves everyone asking for more. Sometimes, the best moments are those that don’t come perfectly but taste just right.

Hi, I’m Jonny Andrew Miller, the cook, taster, and slightly messy mind behind Bite & Boom. I live in Austin, Texas, a city that smells like barbecue smoke, fresh tortillas, and late-night tacos if you wander long enough. It suits me.
