
Hey there, sweet tooth! Ready to bake up some nostalgia? These homemade Rice Krispie Treats are your new best friend—creamy, crunchy, and oh-so-easy. No need to trek to the store; with just a handful of pantry staples, you can whip up a batch in no time. Plus, they’re miles better than store-bought—the perfect balance of buttery sweetness and light, airy crunch that melts in your mouth.
And let’s be honest—kitchen wins are the best, right? Think of these treats as your sweet, crunchy hug in every bite. Whether you’re making them for a quick snack, a fun kid’s activity, or just because, they’re guaranteed to satisfy. Oh, and if you’re feeling playful, why not toss in some mini chocolate chips or sprinkles? It’s a treat that’s just as fun to make as it is to eat. Ready to get your hands sticky? Let’s do this!
Homemade Rice Krispie Treats
Ingredients
Equipment
Method
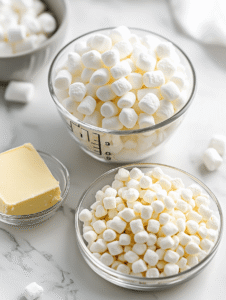
- Measure out the mini marshmallows and rice cereal, and set aside. Cut the butter into small pieces.4 cups mini marshmallows, 3 tablespoons unsalted butter, 6 cups Crisped rice cereal
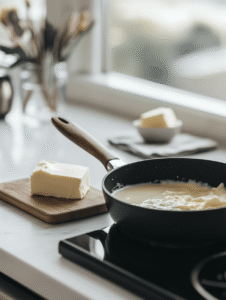
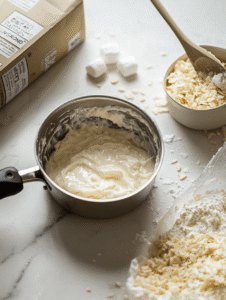
- Grease the baking pan or line it with parchment paper for easy removal. Melt the butter in a large saucepan over low heat, stirring occasionally, until fully melted and starting to bubble softly.3 tablespoons unsalted butter
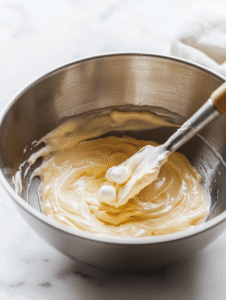
- Add the mini marshmallows to the melted butter. Continuously stir with a rubber spatula until the marshmallows are completely melted and the mixture is smooth, about 3-4 minutes. You should see a glossy, stretchable consistency.4 cups mini marshmallows
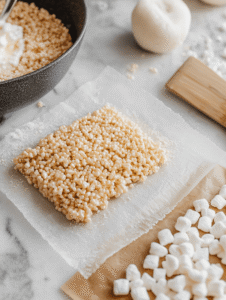
- Remove the saucepan from heat. Immediately pour the crispy rice cereal into the marshmallow mixture. Gently fold and stir until the cereal is evenly coated and the mixture is well combined.6 cups Crisped rice cereal
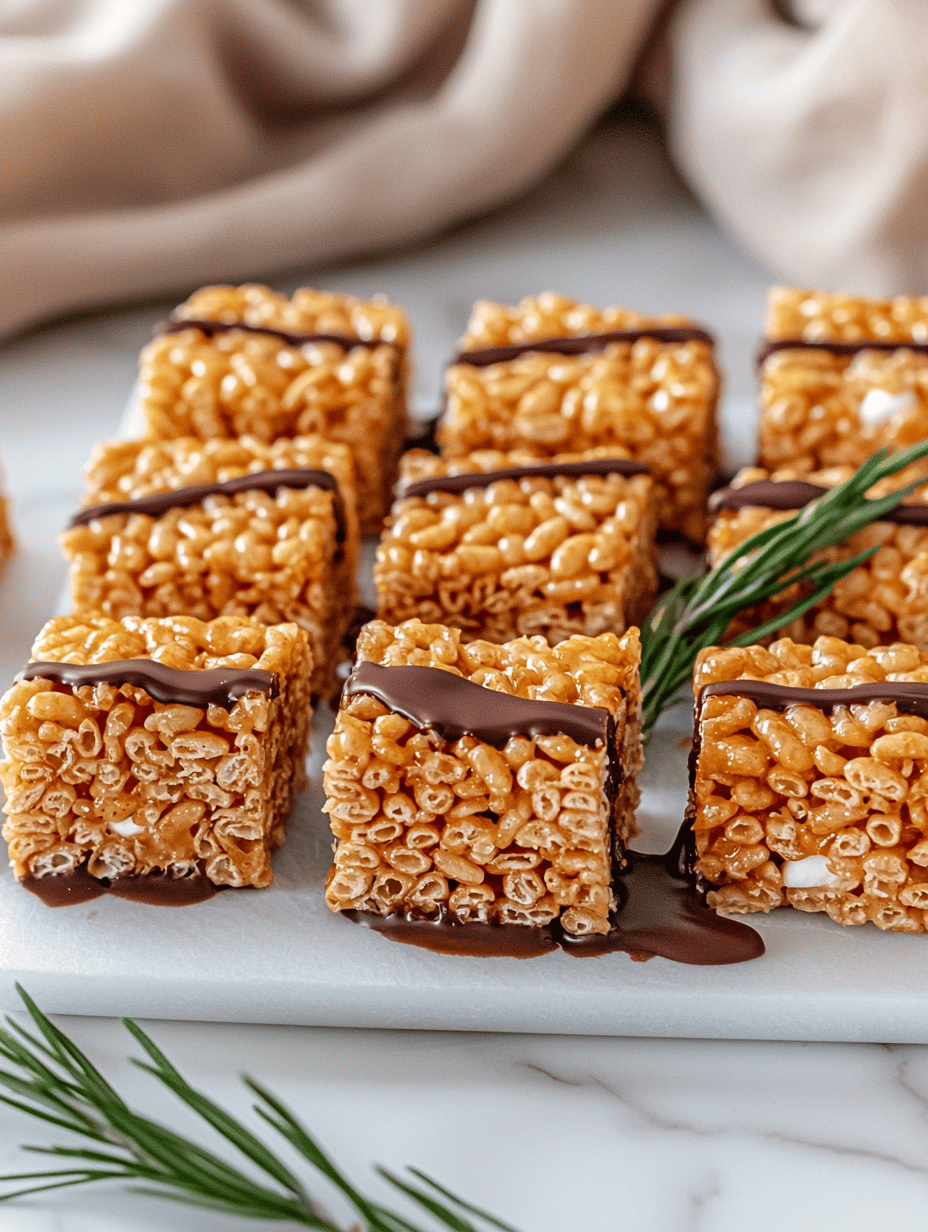
- Transfer the mixture into the prepared baking pan. Using a greased spatula or wax paper, press the mixture evenly into the pan to about 1-inch thickness. Don’t press too hard to keep the treats light and airy.
- Let the treats cool at room temperature for at least 30 minutes until set and firm. Once cooled, cut into squares and serve.
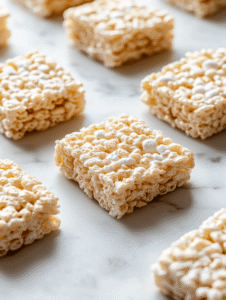
And there you have it—delicious, homemade Rice Krispie Treats that come together faster than you can say “sweet tooth!” Enjoy them as a casual snack or dress them up for a party—either way, they’re a guaranteed hit. My final tip? Cut them into fun shapes or add a drizzle of chocolate for an extra special touch. Feel free to share your creations or swap in your favorite mix-ins—I’d love to hear your ideas! Happy snacking, kitchen buddy!

Hi, I’m Jonny Andrew Miller, the cook, taster, and slightly messy mind behind Bite & Boom. I live in Austin, Texas, a city that smells like barbecue smoke, fresh tortillas, and late-night tacos if you wander long enough. It suits me.
