
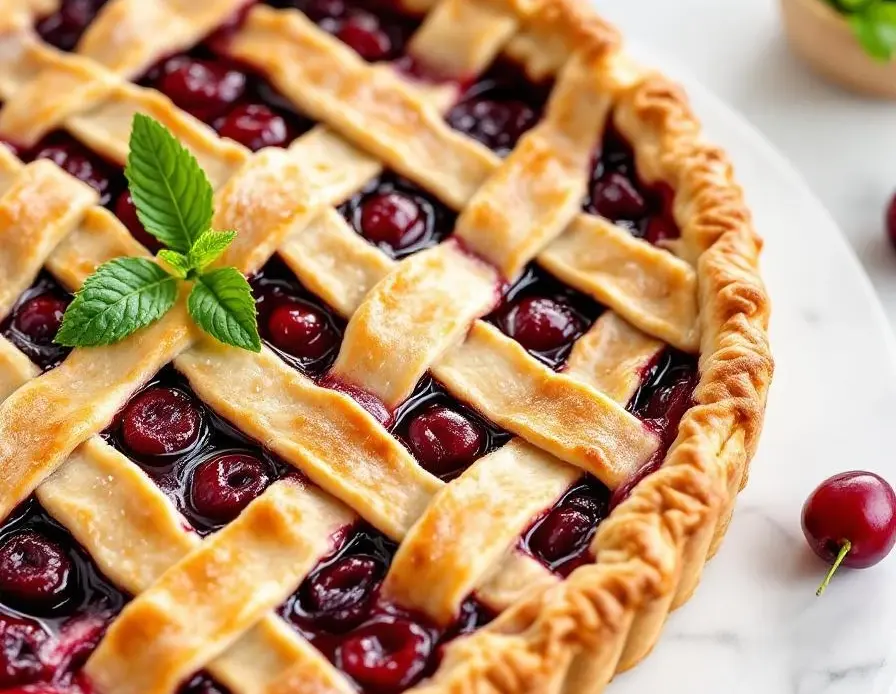
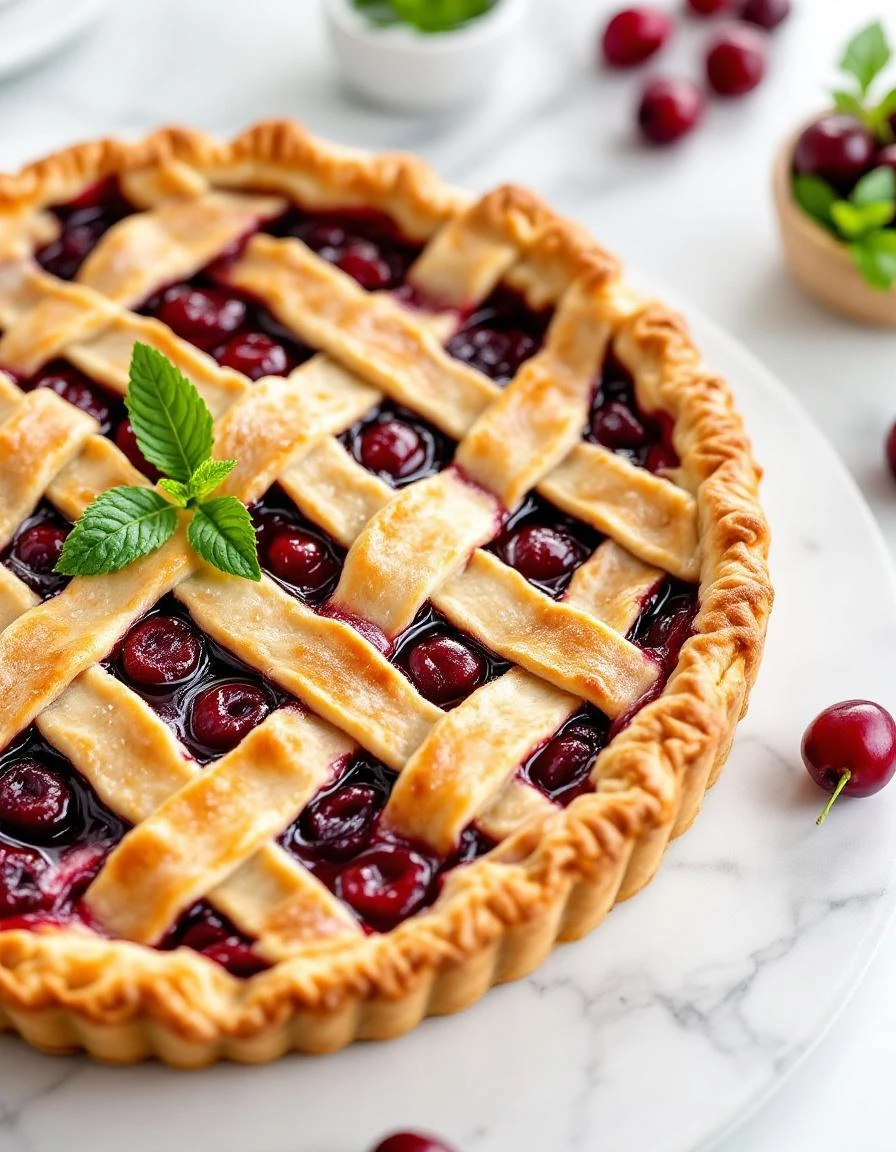
Making a cherry pie means dealing with sticky, stained countertops and a mountain of pitted cherries that catch juice and stain fingers. You’ll be scooping fruit into the crust with a splash and a squish, then crimping edges with flour-dusted fingers.
As the pie bakes, the house fills with a bubbling, jammy scent that rises from the oven, and the crust turns a golden brown, crackling slightly when you tap it. You’ll need to keep an eye on the edges to prevent burning, especially in the last 15 minutes.
The way the cherry filling bubbles and pops as it heats, releasing a sweet, smoky aroma that fills the kitchen.
What goes into this dish
- Fresh cherries: I go for ripe, plump cherries that smell sweet and smell like summer. If you can’t find fresh, frozen works—just thaw and drain well to avoid a soggy crust.
- Sugar: Granulated sugar adds that perfect sweet boost. You can swap in honey or maple syrup if you want a richer, caramelized note—reduce the liquid elsewhere to compensate.
- Cornstarch: I use this as a thickener to keep the filling from being runny. Arrowroot is a good gluten-free alternative, but it gives a slightly glossier finish.
- Lemon juice: Brightens the cherries with a zing. Skip if you prefer a mellow flavor, but it really lifts the overall taste, especially with tart cherries.
- Pie crust: I prefer a flaky butter crust, but a store-bought works in a pinch. For a different twist, try adding a pinch of cinnamon or almond extract into the dough.
- Butter: Dotting the filling with small pieces of butter gives it a silky, rich finish. Margarine can be used but won’t melt as smoothly, so the texture might be slightly less luscious.
- Egg wash: Brushing the crust with beaten egg gives it a shiny, golden finish. Milk or cream can be used instead for a softer sheen, but the color won’t be as vibrant.
Classic Cherry Pie
Ingredients
Equipment
Method
- Begin by preparing the cherry filling: in a large mixing bowl, gently toss the pitted cherries with sugar, cornstarch, and lemon juice until evenly coated. Set aside to let the flavors meld.
- Roll out one pie crust on a lightly floured surface to fit your pie dish, then transfer it carefully into the dish, pressing gently to fit the bottom and sides.
- Pour the prepared cherry filling into the crust, spreading it out evenly with a spoon or spatula. Dot the filling with small pieces of butter to add richness.
- Cover the filling with the second pie crust, trimming any excess dough and crimping the edges together to seal. Cut a few small slits in the top crust for steam escape.
- Brush the top crust with the beaten egg to give it a shiny, golden finish. Place the assembled pie on a baking sheet to catch any drips, then put it in a preheated oven at 375°F (190°C).
- Bake for about 45 minutes, or until the crust is golden brown and the filling is bubbling thickly through the slits. Keep an eye on the edges to prevent burning; if they brown too quickly, shield with foil or a crust shield in the last 15 minutes.
- Once baked, remove the pie from the oven and let it cool for at least 2 hours to allow the filling to set. Serve slices warm or at room temperature and enjoy the luscious, jammy cherry goodness with a flaky crust.
Common Cherry Pie Mistakes & Fixes
- FORGOT to chill the crust dough; it becomes tough, fix by refrigerating for at least 30 minutes.
- DUMPED too much juice before baking; causes a soggy bottom, drain excess carefully before filling.
- OVER-TORCHED the crust edges; they turn bitter, shield with foil or a crust shield in the last 15 minutes.
- MISSED adding lemon juice; filling lacks brightness, squeeze in fresh lemon just before mixing.
Make-Ahead and Storage Tips
- You can prepare the cherry filling a day ahead; keep it covered in the fridge for up to 24 hours to let flavors meld and juices settle.
- Assemble the pie crust and filling together a few hours before baking; refrigerate for up to 2 hours to keep the crust cold and flaky.
- Freeze unbaked pies for up to 2 months; wrap tightly to prevent freezer burn. Thaw in the fridge overnight before baking.
- Reheat slices in the oven at 350°F, about 10-15 minutes, until the filling is bubbly and the crust is crisp again, checking for that satisfying crackle under your fork.
- Filling may deepen in flavor overnight in the fridge, becoming slightly more concentrated and intense, so taste test before baking if you want a milder sweetness.
FAQs
1. How do I pick the best cherries?
Look for cherries that are deep red, firm, and smell sweet and fragrant. If fresh aren’t available, frozen works—just drain the excess juice to avoid sogginess.
2. How do I pit cherries efficiently?
Use a sharp knife or pitter to easily remove pits without crushing the fruit. A gentle hand prevents squishing and keeps the filling juicy.
3. How do I know when the pie is done?
Bake until the crust is golden and the filling bubbles thickly, with a fragrant, jammy aroma. The edges should be crisp, not burnt, and the filling gooey but set.
4. How should I reheat leftover cherry pie?
Let the baked pie cool at least 2 hours so the filling firms up. Reheat in the oven until bubbling and the crust crackles under your fork for that just-baked flavor.
5. Can I prepare this ahead of time?
Store unbaked pies covered in the fridge for up to 2 days or freeze for longer. The flavors deepen overnight, so taste the filling before baking if it’s been a while.

Hi, I’m Jonny Andrew Miller, the cook, taster, and slightly messy mind behind Bite & Boom. I live in Austin, Texas, a city that smells like barbecue smoke, fresh tortillas, and late-night tacos if you wander long enough. It suits me.
