
Garlic often feels like the unsung hero in roasted vegetables, especially when slow-cooked to golden, sweet perfection. This recipe turns plain broccoli into something unexpectedly rich by focusing on the magic of caramelized garlic, which transforms from sharp and pungent to nutty and mellow as it roasts. It’s a simple tweak but one that makes all the difference in how you experience this humble veggie.
I’ve always been a fan of roasting broccoli because of that slightly smoky, tender bite, but adding extra time for the garlic changed everything. Watching those cloves soften and turn a deep honey color, releasing a fragrant aroma that fills the kitchen, makes me feel like I’ve unlocked a secret. It’s a quiet, slow process that yields a surprisingly complex dish, perfect for days when I want comfort without much fuss.
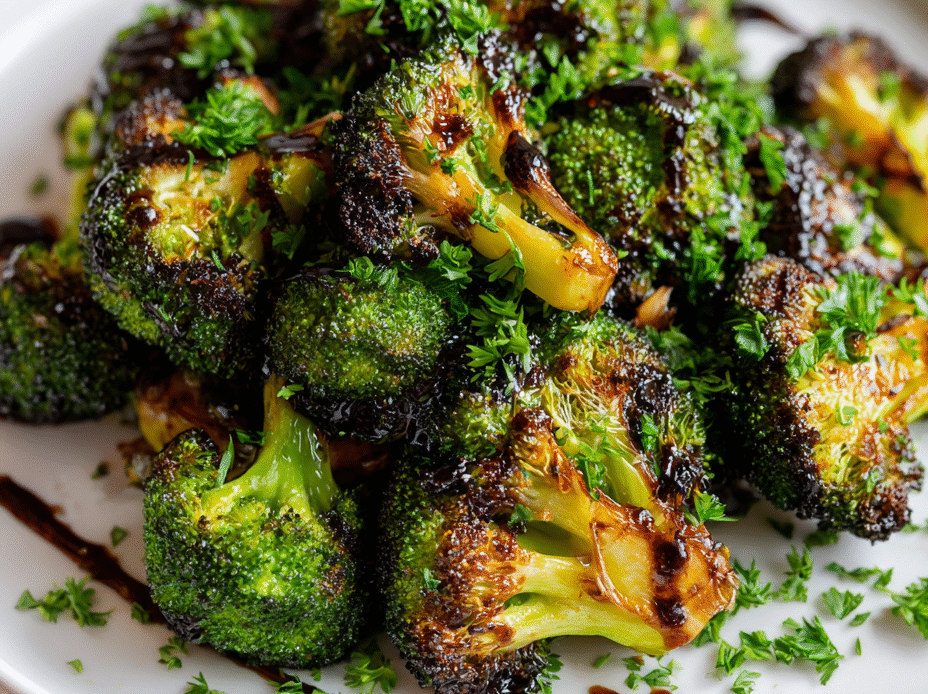
Focusing on the overlooked magic of caramelized garlic in roasted broccoli, emphasizing how slow roasting transforms the garlic into a sweet, nutty accent that elevates the humble veggie to something unexpectedly rich and comforting.
The story behind this recipe
- This recipe was born out of a kitchen experiment during a quiet weekend. I wanted to see if longer roasting would deepen the garlic’s sweetness and somehow make the broccoli more satisfying than usual. Turns out, slow roasting those garlic cloves transforms them into little caramelized nuggets of golden, sweet richness—so different from the raw or quick-roasted versions. That slow, gentle heat unlocks a nutty, mellow flavor that sticks with you long after the meal ends.
- Sometimes, it’s those humble ingredients—garlic and broccoli—that need a little patience and gentle heat to shine. I love how the smell of garlic slowly roasting becomes this warm, inviting aroma that fills the space, pulling everyone to the table. It’s a simple dish, but each step feels like a small act of culinary mindfulness, turning everyday veggies into something unexpectedly indulgent.
- heading: ‘The story behind this recipe’
Ingredient breakdown: key components
- Broccoli: I prefer crowns with tight, dark green florets—they hold their shape better and get a lovely char. Swap with cauliflower if you want a milder, nuttier flavor and a softer bite.
- Garlic: I love using big, plump cloves for roasting—they turn sweet and tender, almost spreadable after baking. For a milder garlic flavor, try smaller cloves or reduce roasting time slightly.
- Olive oil: I use a good extra virgin for that rich, fruity aroma that crisps up beautifully in the oven. If you want a lighter dish, substitute with avocado oil—less smoky, but still rich.
- Salt: I add coarse sea salt for crunch and flavor enhancement. For a lower-sodium option, use a light sprinkle of flaky finishing salt after roasting.
- Black pepper: Freshly cracked gives a sharp bite that balances the richness. Skip if you prefer a milder, more uniform flavor or try smoked pepper for a subtle smoky note.
- Lemon juice (optional): A squeeze brightens the dish with zesty freshness. Skip if you want a purely savory profile, but don’t omit if you love that zing at the end.
Spotlight on key ingredients
Olive oil:
- Broccoli: I prefer crowns with tight, dark green florets—they hold their shape better and get a lovely char. Swap with cauliflower if you want a milder, nuttier flavor and a softer bite.
- Garlic: I love using big, plump cloves for roasting—they turn sweet and tender, almost spreadable after baking. For a milder garlic flavor, try smaller cloves or reduce roasting time slightly.
- I use a good extra virgin for that rich, fruity aroma that crisps up beautifully in the oven. If you want a lighter dish, substitute with avocado oil—less smoky, but still rich.
Notes for ingredient swaps
- Dairy-Free: Skip butter or cheese; use olive oil for richness, but expect less creaminess and a more herbaceous note.
- Vegan: Substitute honey with maple syrup or agave; the sweetness will be subtler, and aroma slightly different.
- Low-Sodium: Use less salt or opt for a salt-free seasoning blend; flavors will be more delicate and less punchy.
- Extra-Virgin Olive Oil: Go for a fruity, peppery oil; lighter oils like grapeseed can mute the roasted aroma slightly.
- Garlic Variations: Use roasted garlic for a sweeter, milder flavor or garlic powder for convenience, but lose that fresh bite.
- Lemon Juice: Swap with apple cider vinegar for a tangy kick—less bright, more vinegary depth.
- Herbs & Spices: Add red pepper flakes for heat or smoked paprika for a smoky depth—adjust to your taste for extra layers.
Equipment & Tools
- Baking sheet: To hold the broccoli for roasting evenly.
- Parchment paper: Optional, for easier cleanup and preventing sticking.
- Chef’s knife: To cut broccoli into uniform florets and slice garlic.
- Mixing bowl: To toss broccoli and garlic with oil and seasonings.
- Spatula or tongs: To spread and flip broccoli during roasting.
Guide to Garlic Roasted Broccoli
- Preheat your oven to 200°C (400°F). Get a baking sheet ready—lined with parchment if you like easier cleanup.
- Cut the broccoli into roughly 2-inch florets. Keep the stems intact if they’re tender, or slice them thin for even roasting.
- Peel 4-6 large garlic cloves. Leave some whole, a few sliced thin—this contrast adds texture and depth.
- Toss the broccoli with 3 tbsp olive oil, making sure each floret is coated—use your hands for even coverage.
- Spread the broccoli on the baking sheet in a single layer. Sprinkle with coarse sea salt and freshly cracked black pepper.
- Scatter the garlic cloves across the broccoli. If sliced, distribute evenly; whole cloves can sit nestled in the florets.
- Roast for 20-25 minutes. Check at 20; the broccoli should be tender and slightly charred at the edges, garlic golden and fragrant.
- a. Flip or shake the pan halfway through to promote even browning. Watch for smoky hints and deepening color.
- b. If garlic starts to burn (black edges), cover loosely with foil or remove early. If broccoli isn’t charred enough, roast a few minutes longer.
- c. If the garlic is not soft or caramelized, give it a bit more time but keep a close eye to prevent overburning.
- Remove from oven and let sit for 2 minutes. The garlic will continue to mellow as it cools slightly.
- Finish with a squeeze of lemon juice if you like a bright contrast. Serve hot or at room temperature, garnished with extra flaky salt if desired.
Let the roasted broccoli sit for a couple of minutes before serving. Finish with a squeeze of lemon or a sprinkle of flaky salt for added brightness and crunch. Serve directly from the baking sheet or transfer to a platter for a more polished look.
How to Know It’s Done
- Broccoli is tender, with slightly crisp edges and a smoky hue.
- Garlic cloves are soft, golden, and fragrant—spreadable if sliced.
- Overall dish has a caramelized aroma with a hint of smoky richness.
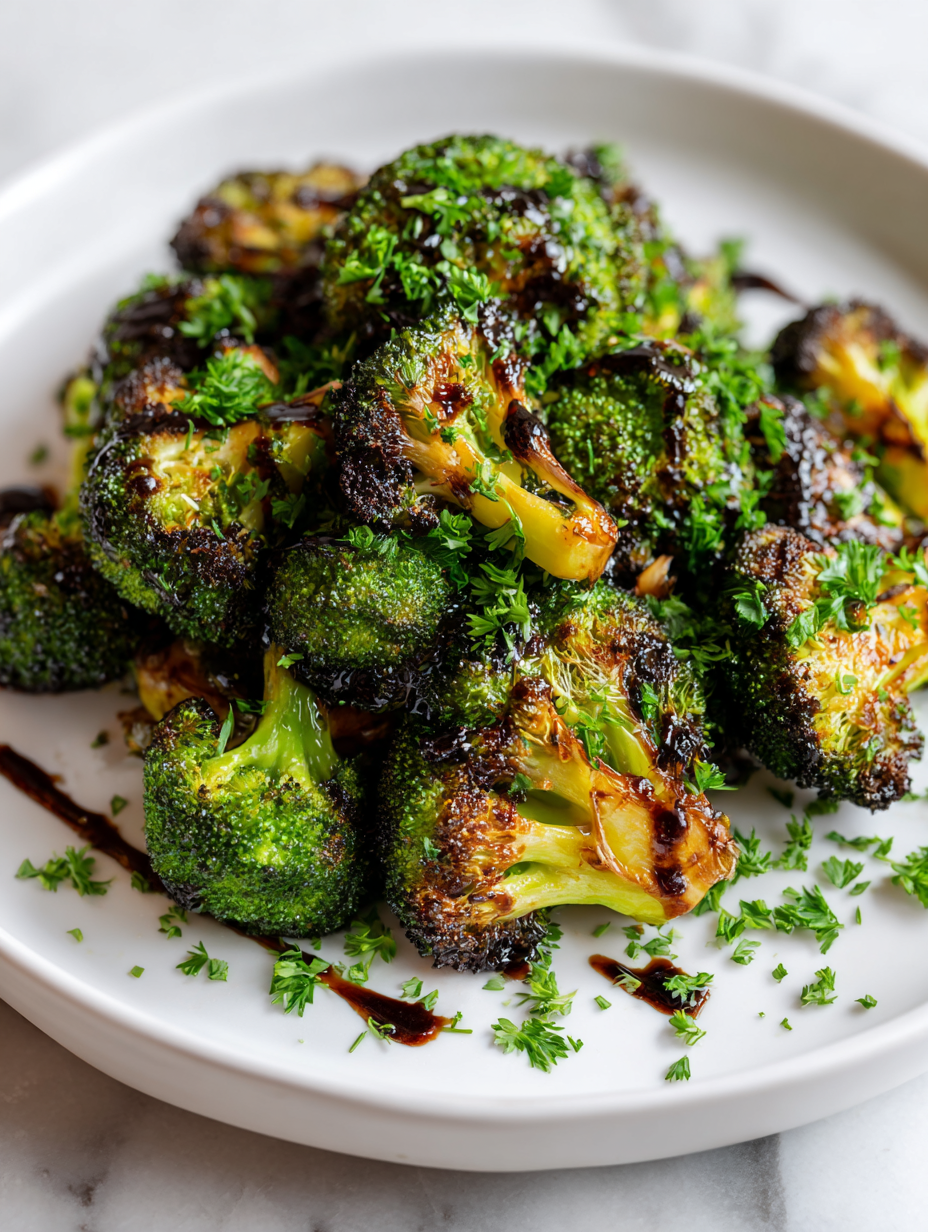
Slow-Roasted Garlic Caramelized Broccoli
Ingredients
Equipment
Method
- Preheat your oven to 200°C (400°F). Line a baking sheet with parchment paper for easy cleanup and even roasting.
- Peel the garlic cloves and leave some whole, slicing a few thinly to add texture and sweetness later.
- Cut the broccoli into roughly 2-inch florets, keeping the stems intact if they’re tender.
- In a mixing bowl, toss the broccoli with 3 tablespoons of olive oil, ensuring each piece is lightly coated. Add a pinch of coarse sea salt and freshly cracked black pepper for flavor.
- Spread the broccoli in a single layer on the prepared baking sheet. Nestle the garlic cloves among the florets, placing some whole and some sliced for a variety of textures and caramelization.
- Roast in the oven for 20-25 minutes, until the broccoli is tender, charred at the edges, and the garlic is golden and fragrant. Shake or flip the pan halfway through to promote even browning.
- Keep an eye on the garlic; if it starts to blacken too quickly, cover loosely with foil or remove early. The garlic should be soft, sweet, and spreadable.
- Once done, remove from the oven and let sit for a couple of minutes. Squeeze fresh lemon juice over the roasted broccoli and garlic for a bright finishing touch, if desired.
- Serve the roasted garlic broccoli warm, garnished with extra flaky salt if you like, and enjoy the rich, caramelized flavors with every bite.
Tips & Tricks for Perfect Roasted Broccoli
- Use a hot oven to jumpstart caramelization and get those florets slightly charred.
- Toss broccoli and garlic in oil thoroughly—this ensures even browning and prevents sticking.
- Thinly sliced garlic develops a sweet, nutty flavor faster—slice or crush for quicker caramelization.
- Watch garlic carefully in the last 5 minutes—its color shifts quickly from golden to burnt.
- Flip or shake the pan halfway—this promotes even roasting and prevents burnt spots.
- Rest the roasted broccoli for a few minutes—this lets flavors settle and garlic mellow.
- Finish with a squeeze of lemon—brightens the deep, roasted flavors and adds a fresh pop.
Common mistakes and how to fix them
- FORGOT to preheat oven → Always preheat to ensure even roasting and caramelization.
- DUMPED broccoli on pan → Spread evenly to avoid steaming and promote browning.
- OVER-TORCHED garlic → Remove early if garlic turns too dark or bitter.
- MISSED flipping halfway → Flip for uniform char and prevent burnt spots.
Fast fixes for roasted broccoli
- If garlic burns, splash with a bit of lemon juice to mellow bitterness.
- When florets steam instead of roast, increase oven temperature and spread out more.
- Splash with a touch of balsamic vinegar if broccoli looks dull or flat in flavor.
- Patch over undercooked garlic by roasting a few extra minutes until golden and fragrant.
- Shield the garlic if blackening too quickly—cover loosely with foil to slow browning.
Prep, store, and reheat tips
- You can prep the broccoli and garlic a day ahead; keep the florets and peeled garlic in airtight containers in the fridge. The smell becomes more pungent but still fresh.
- Store roasted broccoli in an airtight container for up to 3 days in the fridge; reheating will soften the edges, but the aroma of garlic deepens overnight.
- Reheat in a 180°C (350°F) oven for about 10 minutes until warmed through and slightly crispy around the edges. Expect a mellow, caramelized garlic aroma when hot.
- For longer storage, freeze roasted broccoli in a freezer-safe bag for up to a month. The texture softens slightly, and flavors become more concentrated after thawing.
Top questions about garlic roasted broccoli
1. How do I choose the best garlic for roasting?
Look for garlic cloves that are plump, firm, and unblemished. Smaller cloves will roast faster and less sweetly.
2. Should I peel the garlic before roasting?
Peel the garlic cloves before roasting for even caramelization. Whole cloves turn sweet and spreadable after baking.
3. How do I know when the broccoli is done?
Roast the broccoli until edges are charred and tender, about 20-25 minutes at 400°F (200°C). The garlic should be golden and fragrant.
4. Can I use a different oil?
Use a good quality extra virgin olive oil for rich flavor and better browning. Less flavorful oils won’t produce the same aroma.
5. Can I use cauliflower instead of broccoli?
Yes, you can substitute cauliflower for broccoli. It roasts similarly and offers a milder, nuttier flavor.
6. How do I prevent the garlic from burning?
Roasting garlic slowly turns it sweet and nutty. If it starts to burn, remove it early or lower the oven temperature slightly.
7. Should I add lemon or lemon juice?
Add a squeeze of lemon juice after roasting to brighten the flavors and balance the richness of the garlic.
8. Can I make it crispier?
For extra crunch, broil for the last 2 minutes. Keep a close eye to avoid burning the garlic.
9. How should I store leftovers?
Store leftovers in an airtight container for up to 3 days. Reheat in the oven at 350°F (180°C) for 10 minutes.
10. What if my garlic burns?
If garlic burns during roasting, cover the pan loosely with foil and continue cooking to protect it.
This garlic roasted broccoli isn’t just a side; it’s a small act of patience that transforms everyday ingredients into something richer. That slow caramelization of garlic, the smoky edges of broccoli—these are the moments I keep coming back to in my kitchen. It’s honest food, made better by a little quiet time in the oven.
Whenever I make this, I remember why I love simple dishes—because they reveal how much flavor can develop with just a bit of care. It’s a reminder that sometimes, the best results come from allowing ingredients to fully soften and deepen. No fuss, just a dish that feels like a small, deliberate celebration of flavor.

Hi, I’m Jonny Andrew Miller, the cook, taster, and slightly messy mind behind Bite & Boom. I live in Austin, Texas, a city that smells like barbecue smoke, fresh tortillas, and late-night tacos if you wander long enough. It suits me.
