
Getting this corn on the grill means peeling back the husks, revealing those bright yellow kernels that have a slight give when pressed. It’s a messy, sticky job, especially when you’re trying to strip and clean each cob without tearing the husk too much.
Once you’re ready to cook, you toss the cobs straight on the hot grill, husk and all, watching as the kernels blister and char, the smell turning sweet and smoky as they cook through.
The crack of the charred kernels as you bite into them, a satisfying snap that echoes the smoky aroma filling the air.
What goes into this dish
- Corn on the cob: I prefer using fresh, sweet corn right from the market; the kernels are plump and juicy, with a slight milky sweetness. If you only have frozen, thaw thoroughly, but the fresh stuff really sings with that smoky char.
- Husks: Keep the husks on for that smoky flavor and easy handling. You can peel them back, remove the silk, then fold them back or tie the husks for easier grilling. Skip if you want a faster cook or less smoky flavor.
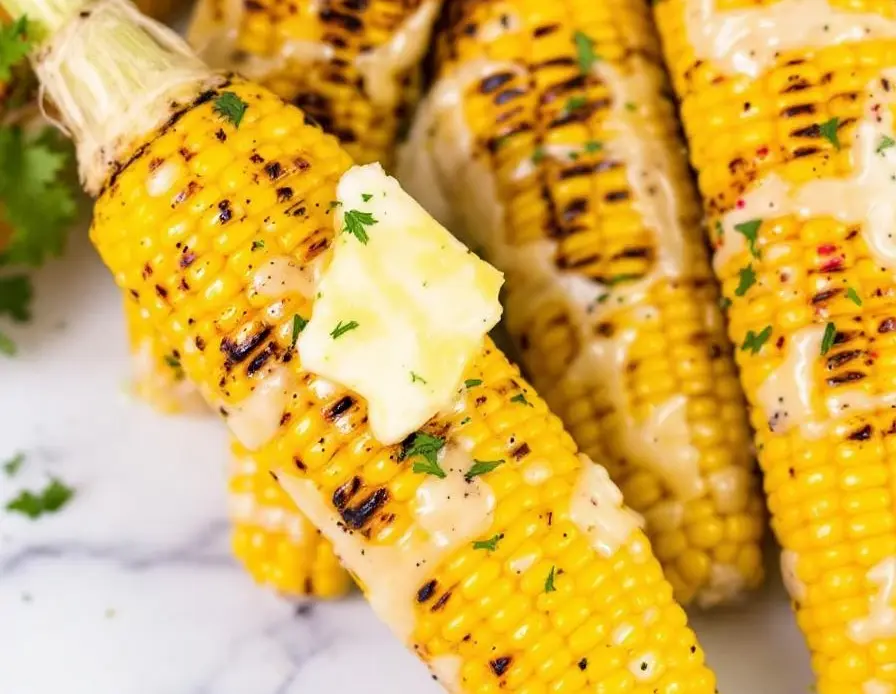
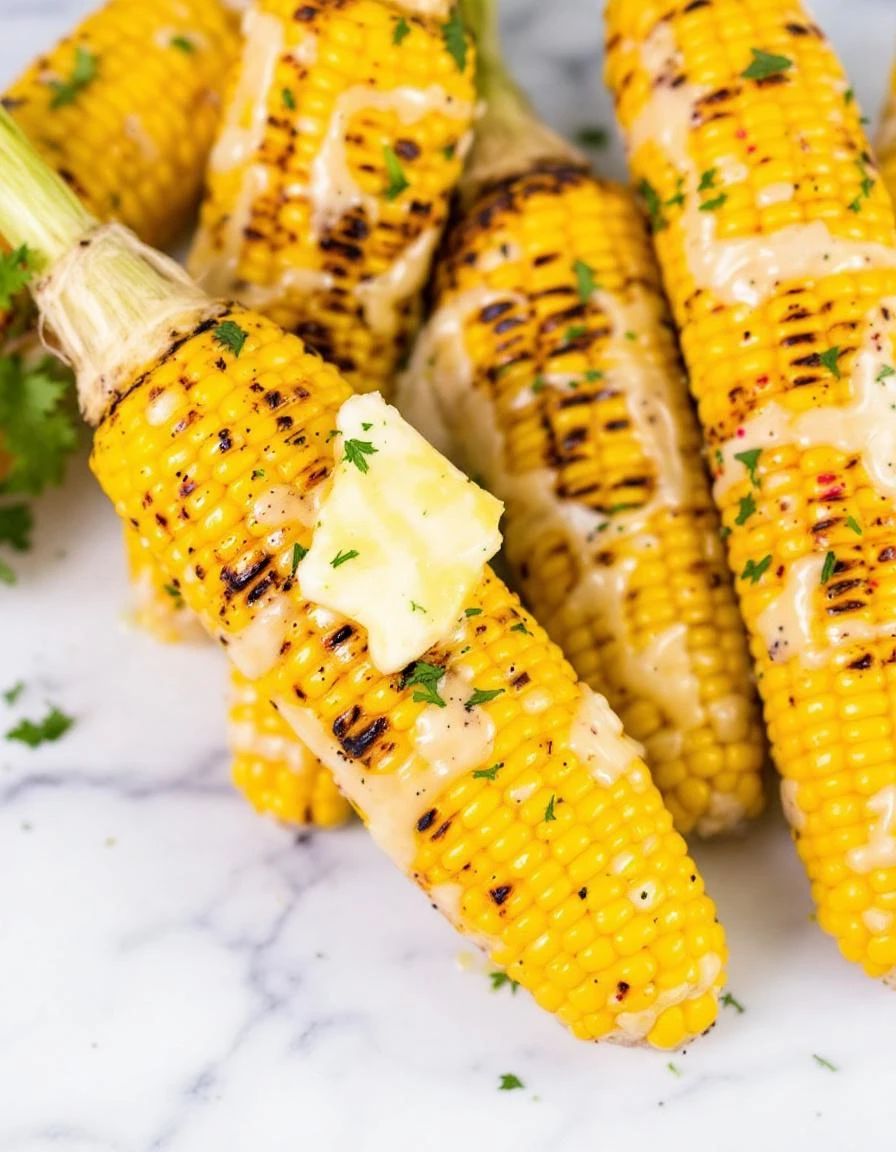
- Butter: Use good salted butter, melted and brushed on hot kernels. For a twist, mix in smoked paprika or lemon zest. Skip if dairy isn’t your thing or for a lighter version—just a sprinkle of sea salt works.
- Seasonings: Salt, freshly ground black pepper, maybe a squeeze of lime for brightness. I sometimes add chili powder or cumin for a smoky kick. Skip if you prefer a milder, more traditional flavor.
- Oil: A light coat of vegetable or canola oil helps prevent sticking and promotes even charring. Skip if you’re aiming for a lower-fat version—just keep an eye on the kernels to avoid burning.
- Lemon or lime: Brightens up the smoky richness with a quick squeeze after grilling. If you don’t have citrus, a splash of vinegar can add a touch of tang. Skip if citrus isn’t your thing.
- Optional herbs: Chopped cilantro or parsley sprinkled on after grilling adds fresh color and flavor. Skip if you’re not into herbs or want a more neutral taste.
Grilled Corn on the Cob with Butter and Seasonings
Ingredients
Equipment
Method
- Preheat your grill to medium-high heat, allowing it to become hot and ready for cooking.
- Carefully peel back the husks of each corn cob without removing them entirely, then remove the silky threads inside. Fold the husks back around the corn or tie them for easier handling.
- Brush each prepared cob lightly with vegetable oil or spray to prevent sticking and promote even charring.
- Place the husked cobs directly on the grill, husks and all, and cover with the lid. Grill for about 10-15 minutes, turning occasionally, until the kernels blister and char in spots, releasing a sweet smoky aroma.
- Using tongs, carefully remove the hot cobs from the grill and set them on a serving platter. Let them sit for a minute to cool slightly.
- Unwrap the husks just enough to expose the kernels, then brush the hot corn generously with melted butter, allowing it to melt and seep into the charred spots.
- Squeeze fresh lime juice over the corn for brightness, then sprinkle with salt, pepper, and optional chopped herbs for added flavor and color.
- Serve immediately while the kernels are juicy, smoky, and tender, with a satisfying snap with each bite.
Common mistakes and how to fix them
- FORGOT to preheat the grill properly, leading to uneven charring—always give it time to heat up.
- DUMPED the husks directly into the fire, causing flare-ups—keep them damp or tied back for control.
- OVER-TORCHED the kernels, making them black and bitter—watch closely after the first few minutes.
- MISSED brushing with butter, losing flavor and moisture—apply it generously during the last few minutes.
Make-Ahead and Storage Tips
- Peel and clean the husks and silk from the corn a day ahead. Keep them wrapped in a damp cloth in the fridge for up to 24 hours.
- If you prefer, blanch the corn slightly in boiling water for 2-3 minutes, then cool and store in an airtight container for up to 2 days in the fridge.
- For longer storage, freeze the prepared cobs wrapped tightly in plastic wrap or in a freezer bag for up to 3 months. Thaw before grilling.
- The flavor of the corn intensifies as it sits, so consider adding extra butter or seasonings after reheating, especially if stored for more than a day.
- Reheat by grilling directly from the fridge or freezer, watching for charring and listening for the kernels to pop slightly—about 5-10 minutes. Baste with butter during the last few minutes for best flavor.
FAQs
1. How do I know when the corn is done?
The smell of roasted corn—sweet, smoky, with a hint of char—hits your nose just as you lift the husks. It’s unmistakable and inviting, making your mouth water before the first bite.
2. How long should I grill the corn?
Look for kernels that are tender and slightly charred, with a burst of juice when pressed. The aroma will turn smoky and sweet, signaling it’s ready to eat.
3. What if the husks catch fire?
Keep the husks moist if you want that smoky flavor and tender kernels. If they start to burn, wrap them in foil or move them to cooler spots on the grill.
4. When should I add butter?
Brushing melted butter on hot corn brings out a glossy shine and enhances flavor. The butter should sizzle gently, releasing a rich, salty aroma as it melts into the kernels.
5. Can I reheat leftovers?
Reheat grilled corn in the oven or on the grill, listening for a slight crackle as the kernels warm and release their smoky, buttery aroma. It’s best within a day for that fresh flavor.

Hi, I’m Jonny Andrew Miller, the cook, taster, and slightly messy mind behind Bite & Boom. I live in Austin, Texas, a city that smells like barbecue smoke, fresh tortillas, and late-night tacos if you wander long enough. It suits me.
