
Air fryer chicken breasts are my secret weapon for those busy weeknights when I want something quick but crave a satisfying crunch. This method transforms an everyday cut into something special—juicy inside, crispy outside, all with minimal fuss. It’s a reminder that good food doesn’t have to be complicated or time-consuming.
Why This Recipe Stays in My Rotation
It’s simple, quick, and endlessly adaptable. I love how reliably juicy and crispy it turns out, no matter the day. Plus, it’s forgiving—little mistakes don’t ruin the final dish. It’s the kind of recipe I keep coming back to when I need dinner fast but still want to feel satisfied.
Ingredients & Their Role in Juicy, Crispy Chicken
- Chicken breasts:: Lean, tender meat that benefits from quick, high-heat cooking for juiciness.
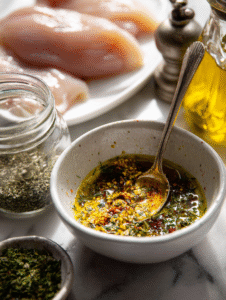
- Olive oil:: Helps the skin crisp up and keeps the meat moist. Skip if aiming for a lower-fat version.
- Salt & pepper:: Basic seasoning that enhances natural flavor. Add garlic powder or paprika for extra punch.
- Herbs (thyme, rosemary):: Fresh or dried herbs add aromatic complexity—go wild with your favorites.
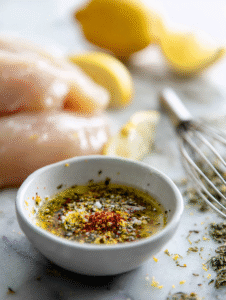
- Lemon zest:: Brightens the flavor with a zing of citrus—perfect for a fresh finish.
- Paprika or chili powder:: Adds smoky warmth or a spicy kick—adjust to your heat preference.
Tools & Equipment for Perfect Chicken
- Air fryer: Main appliance for quick, even cooking with crisp results.
- Kitchen thermometer: To check the internal temperature for safety and perfect doneness.
- Tongs: For flipping and handling the chicken without piercing the meat.
- Paper towels: To pat chicken dry for better crisping.
- Basting brush (optional): To apply oil or marinade evenly.
Step-by-Step to Juicy, Crispy Air Fryer Chicken
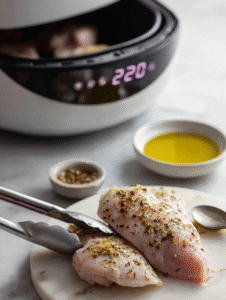
Step 1: Preheat your air fryer to 200°C (390°F).
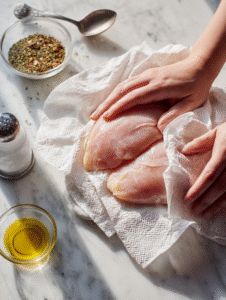
Step 2: Pat the chicken breasts dry with paper towels to remove excess moisture.
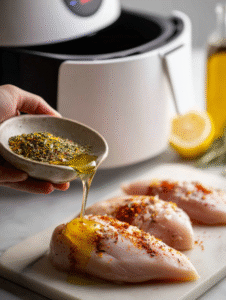
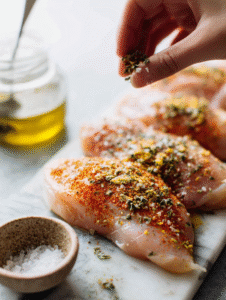
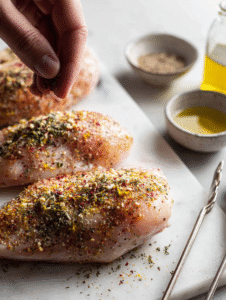
Step 3: Rub the breasts with olive oil and season generously with salt, pepper, and your favorite herbs.
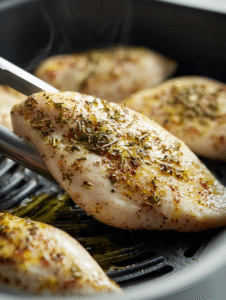
Step 4: Place the chicken breasts in the air fryer basket, skin side down if applicable, ensuring they aren’t touching.
Step 5: Cook for 10 minutes, then flip and cook another 8-10 minutes until golden and cooked through.
Step 6: Check for doneness by inserting a meat thermometer into the thickest part; it should read 75°C (165°F).
Step 7: Let the chicken rest for 5 minutes before slicing. Resting helps the juices redistribute, keeping the meat moist.
Cooking Checkpoints & Tips
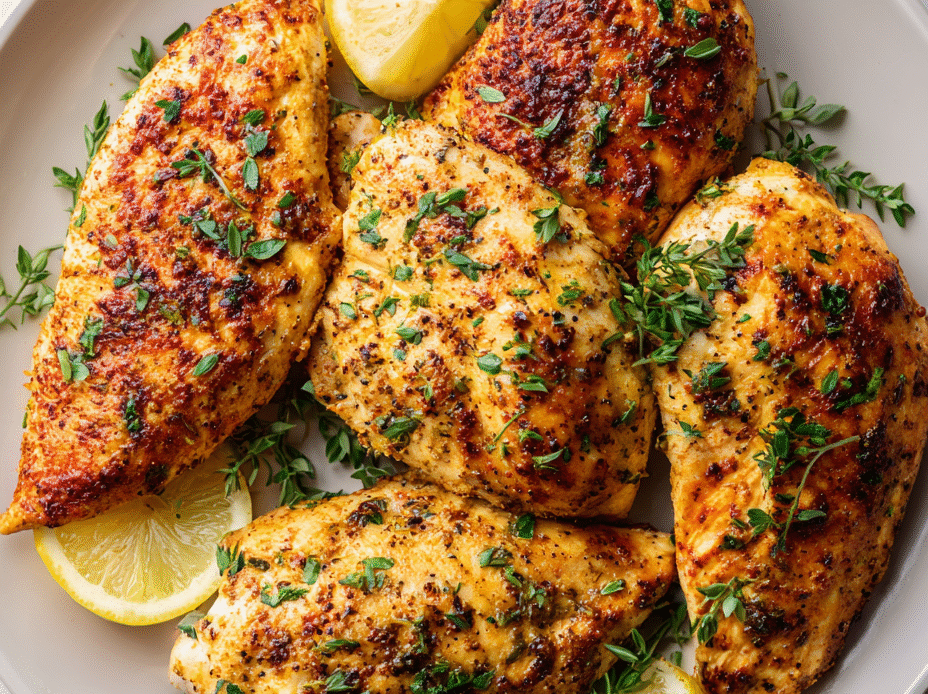
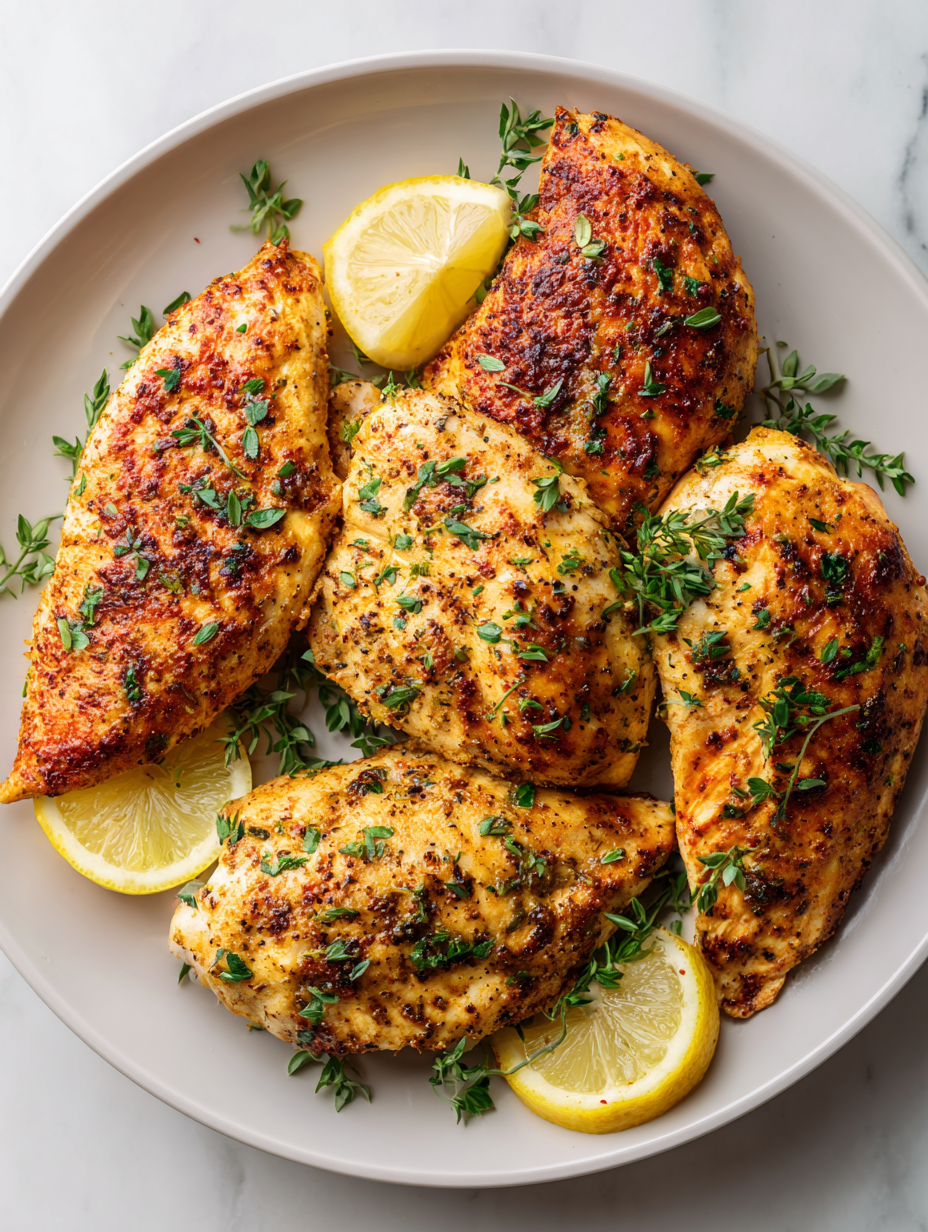
- Look for a deep golden color on the outside—this is the sign of perfect crispness.
- Ensure the internal temperature hits 75°C (165°F)—no pink in the middle.
- Listen for a gentle crackle when flipping—sign of a well-cooked, crispy crust.
Common Mistakes & How to Fix Them
- Cooking blindly without checking internal temp.? Use a meat thermometer to avoid overcooking.
- Chicken turning soggy or unevenly cooked.? Pat chicken dry thoroughly before seasoning.
- Sticking or uneven browning.? Don’t overcrowd the basket—give space for air to circulate.
- Uneven color and texture.? Flip halfway through for even crispness.
Crispy Air Fryer Chicken Breasts
Ingredients
Equipment
Method
- Preheat your air fryer to 200°C (390°F) so it’s hot and ready.
- Pat the chicken breasts dry with paper towels to remove excess moisture, which helps them crisp up nicely.
- In a small bowl, mix together the olive oil, salt, pepper, herbs, lemon zest, and paprika to create a flavorful seasoning mixture.

- Rub the seasoning all over the chicken breasts, ensuring they are evenly coated on all sides.
- Place the chicken breasts in the air fryer basket, skin side down if applicable, making sure they aren’t touching to allow air circulation.
- Cook for 10 minutes, then flip the chicken breasts using tongs for even crisping.
- Continue cooking for another 8-10 minutes, until the chicken is golden brown and the internal temperature reaches 75°C (165°F).
- Remove the chicken from the air fryer and let it rest for 5 minutes. Resting allows the juices to redistribute, keeping the meat moist.
- Slice the chicken breasts and serve immediately, enjoying the juicy interior and crispy exterior.

Hi, I’m Jonny Andrew Miller, the cook, taster, and slightly messy mind behind Bite & Boom. I live in Austin, Texas, a city that smells like barbecue smoke, fresh tortillas, and late-night tacos if you wander long enough. It suits me.
